Want to get rid of cooking smells and steam without hiring anyone? Installing a kitchen extractor fan yourself is easier than you think. With a few basic tools and a clear plan, you can have fresh air blowing in minutes. Let’s walk through what you need, the safest way to mount the fan, and the little tricks pros use.
First, gather your gear. You’ll need a screwdriver set, a drill with appropriate bits, a stud finder, a level, and a safety mask. The fan kit usually comes with a wiring harness, but keep extra electrical tape and wire connectors handy. If your kitchen has plasterboard, a small saw or utility knife will help cut the opening. Check the fan’s power rating matches your home’s circuit – most extractor fans run on a standard 13‑amp socket.
1. Choose the right spot. The fan should sit above the hob, about 650‑750 mm high, and align with any existing vent duct. Use the stud finder to spot ceiling joists; you’ll want to mount the fan between them for solid support.
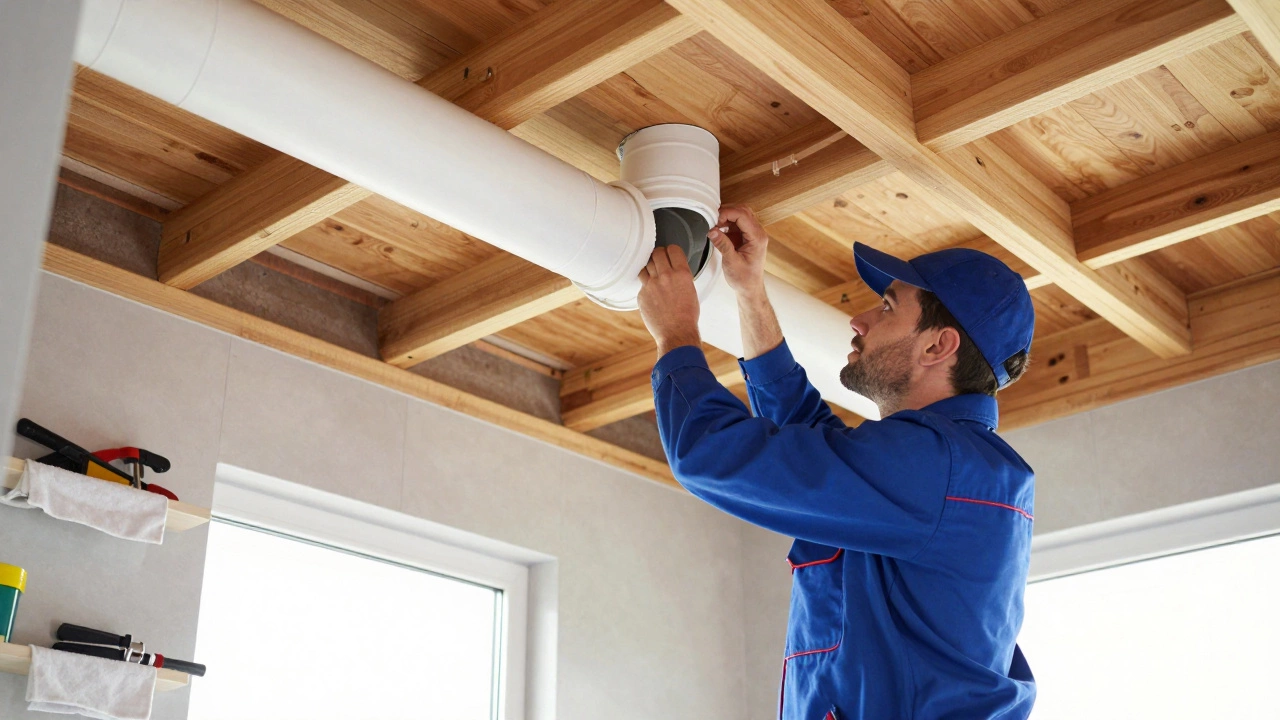
2. Mark and cut the opening. Hold the fan’s frame against the ceiling and trace the outer edge. Double‑check the cut line with a level, then cut carefully with a drywall saw. Keep the cut clean – a jagged edge makes sealing harder.
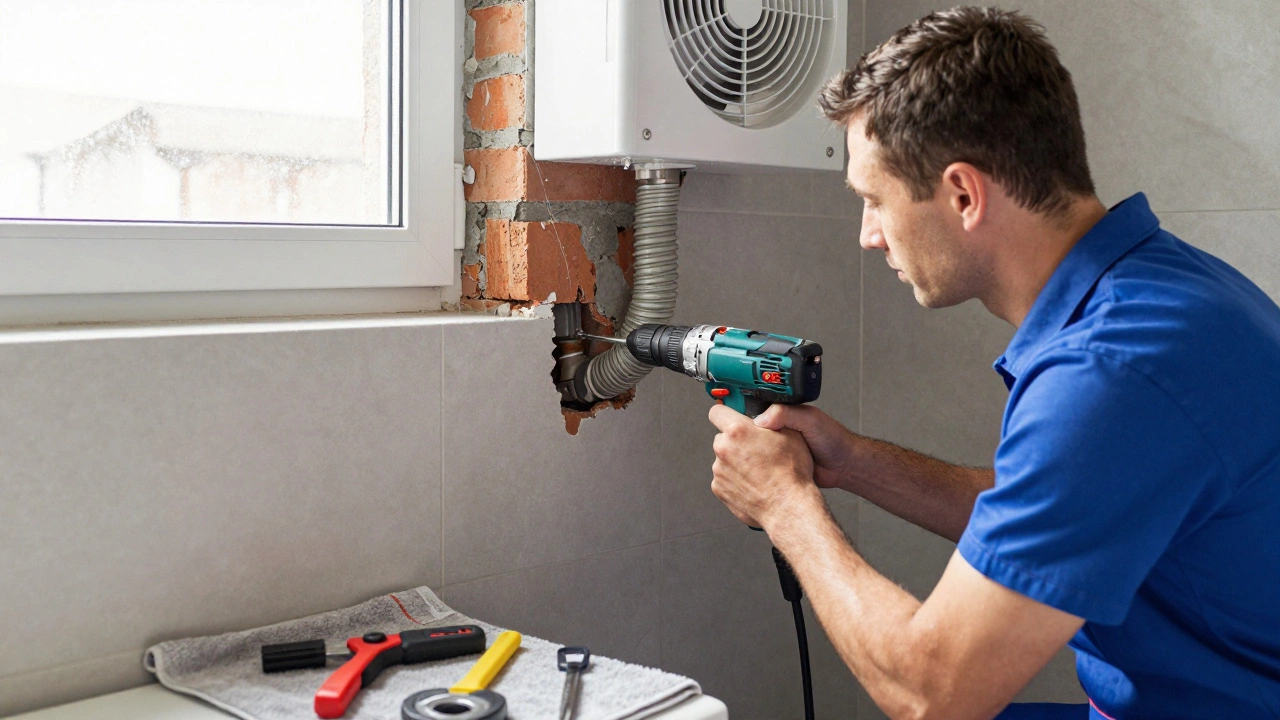
3. Prepare the ducting. Most fans come with a flexible duct that connects to an external vent. Measure the distance to the outside wall, cut the duct to length, and secure it with duct tape. Avoid sharp bends; a smooth path keeps airflow strong.
4. Wire the fan. Turn off the circuit at the consumer unit. If you’re comfortable with basic wiring, connect the fan’s live, neutral, and earth wires to the corresponding points in the ceiling outlet. Twist the connections together, cap with connectors, and wrap with tape. If anything feels unsure, stop here and call a qualified electrician.
5. Mount the fan. Slide the fan into the ceiling opening and line up the mounting brackets. Secure it with the supplied screws, making sure it’s level. Tighten firmly – a wobbling fan makes noise and can damage the ceiling.
6. Seal and finish. Apply a bead of silicone sealant around the fan’s edge to keep moisture out. Fit any decorative covers or grills, then reinstall any ceiling tiles you removed.
7. Test it out. Switch the circuit back on and turn the fan on. You should hear a steady hum and feel air pulling up the duct. Check for vibrations and ensure the external vent flap opens properly.
If you run into any hiccups – like the fan not turning on, strange smells, or a noisy motor – it’s time to call in Bognor Regis Appliance Repair Experts. Our technicians know all fan models and can sort wiring or duct issues quickly.
Remember, safety first. Never work on live wires, and if you’re not 100% comfortable with the electrical part, a qualified electrician can finish the job in minutes. With the right prep, a new extractor fan can make your kitchen feel brighter, cleaner, and more comfortable.
Plumbers can install extractor fan ductwork, but only electricians can legally wire them. Learn who to call for safe, code-compliant installation and how to avoid costly mistakes.
Can a plumber fit an extractor fan? While they can install the unit, only a qualified electrician can legally and safely handle the wiring. Learn what you need to know before hiring anyone.

Thinking of tackling an extractor fan installation on your own? Doing it yourself can be a rewarding project if you have the right tools and know-how. This guide breaks down the process into manageable steps, explains what to watch out for, and offers practical tips to avoid common pitfalls. You'll learn when it makes sense to go DIY and when you might need to call in a pro.

Keeping your home well-ventilated is essential, and extractor fans play a crucial role in maintaining air quality. Whether you're installing a new fan or repairing an old one, it's important to know who to call. Professional electricians and specialized ventilation technicians are the go-to experts. They ensure fans are properly installed and functioning efficiently, saving you from potential hassles down the road.

Replacing an extractor fan might seem challenging, but with the right tools and some guidance, it can be done efficiently. This guide outlines the process of replacing an extractor fan, from identifying signs it needs replacement to understanding how to choose the right model. Learn practical tips for handling installation and maintaining safety during the project. Make this task more approachable with easy-to-follow steps designed for beginners.

A failing water heater element can leave you in the chilly lurch just when you need a warm shower. Learn how to diagnose the problem with simple, straightforward steps. This guide covers common symptoms, testing methods, and practical tips for handling a faulty element. We'll explain what's involved and offer insights for DIY repair or knowing when to call a professional.

Most extractor fans can be repaired with simple fixes like cleaning, capacitor replacement, or tightening parts. Learn when DIY works and when to call a pro to avoid costly damage from damp and mold.

Why would a freezer suddenly stop working? This article uncovers the most common reasons, from electrical hiccups to sneaky broken parts. Get clear tips to troubleshoot on your own before calling in the pros. You'll also find surprising facts—like a forgotten coin trick to check freezing power. Whether it's food loss or a mystery beep, you'll get straight answers and a path to a cold fix.

Wondering if you can fix a faulty gas hob? This article explains what repairs are possible, which issues you can tackle yourself, and when to call in a pro. Get down-to-earth tips on spotting common problems, safety advice, and how regular care can extend your hob’s life. We cover everything from spark ignition troubles to stubborn burners that won’t light. Know what you’re dealing with and avoid expensive mistakes.

Discover what makes some refrigerator repairs more costly than others. From compressor issues to electronic faults, fixing these problems can hit your wallet hard. We'll uncover why some are pricier than others and offer tips on how to avoid them. Learn about preventive measures to save you money in the long run. This guide is a must-read for every fridge owner looking to keep repair costs at bay.