Extractor fans are the unsung heroes of our kitchens and bathrooms, ceaselessly working to whisk away steam, odors, and smoke. But there comes a time when even the most steadfast appliances need replacement. For those with the curiosity and willingness to wield a DIY spirit, changing an extractor fan is a task that might prove surprisingly manageable—but only with the right approach.
Before diving in, recognize the signs of wear and tear, like excessively noisy operations or reduced efficiency. Once the decision to replace is made, choosing a suitable model becomes the next adventure. From sleuthing through specifications to matching the design with your space, each step lays the groundwork for a smooth transition.
In this article, we’ll not only help you figure out when and what to replace but also arm you with a clear step-by-step guide to make the swap. With practical advice on maintaining safety, and a touch of troubleshooting, this guide is crafted to ease even the most hesitant beginner into the world of DIY home improvement.
- Signs It’s Time to Replace Your Extractor Fan
- Choosing the Right Replacement Fan
- Step-by-Step Installation Guide
- Safety Tips and Troubleshooting
Signs It’s Time to Replace Your Extractor Fan
Extractor fans serve as an essential component in maintaining a fresh and healthy environment in your home. Over time, like many appliances, they may begin to show signs that they are nearing the end of their lifespan. Recognizing these signs can save you the inconvenience of unexpected breakdowns and help maintain the air quality inside your living spaces.
One of the most noticeable signs indicating a replacement is needed is noise. A well-functioning fan typically operates smoothly and with little sound. However, if your extractor fan begins to rattle, whir excessively, or produce unusual noises, it might be a sign that the motor bearings are worn out or there is some physical obstruction. In many cases, attempting to fix the noise doesn't provide a lasting solution, and replacing the fan becomes the most viable option.
Another key indicator is diminished performance. You might notice that your kitchen remains smoky, or that bathroom steam lingers longer than it did before. This can often be linked to the build-up of dust or grease within the fan, but if cleaning doesn’t regain its efficiency, then it's a strong signal that the fan's power or suction ability has waned beyond repairable levels.
Age is also a crucial factor. Extractor fans generally have a lifespan of about 10 to 15 years. If your fan is approaching or has surpassed this age, its efficiency might naturally decline, even with proper maintenance. Contemporary models have advanced significantly in energy efficiency and noise reduction, making replacement beneficial in terms of both performance and energy savings.
"Consistently investing in the up-to-date maintenance of household appliances, including extractor fans, can enhance the overall indoor air quality and ensure healthier living conditions," says Miles Burke, author of 'Home Improvement: Essentials'.
A less common, yet important sign is any burning smell emitting from the fan. This could be a warning of overheating or an electrical fault, which signifies a serious problem. Ignoring such signs could be hazardous, potentially leading to more significant damage or even fire risks. Thus, replacing the fan should be prioritized immediately if a burnt smell is detected.
If you notice any of these symptoms, it could be time to explore your options for a new fan. While cleaning or small repairs can sometimes breathe temporary life back into an aging system, they are often just short-term fixes. Ultimately, recognizing these warning signs early and opting for a replacement ensures that you maintain an effective ventilation system, keeping the indoor air crisp and your household safe.
Choosing the Right Replacement Fan
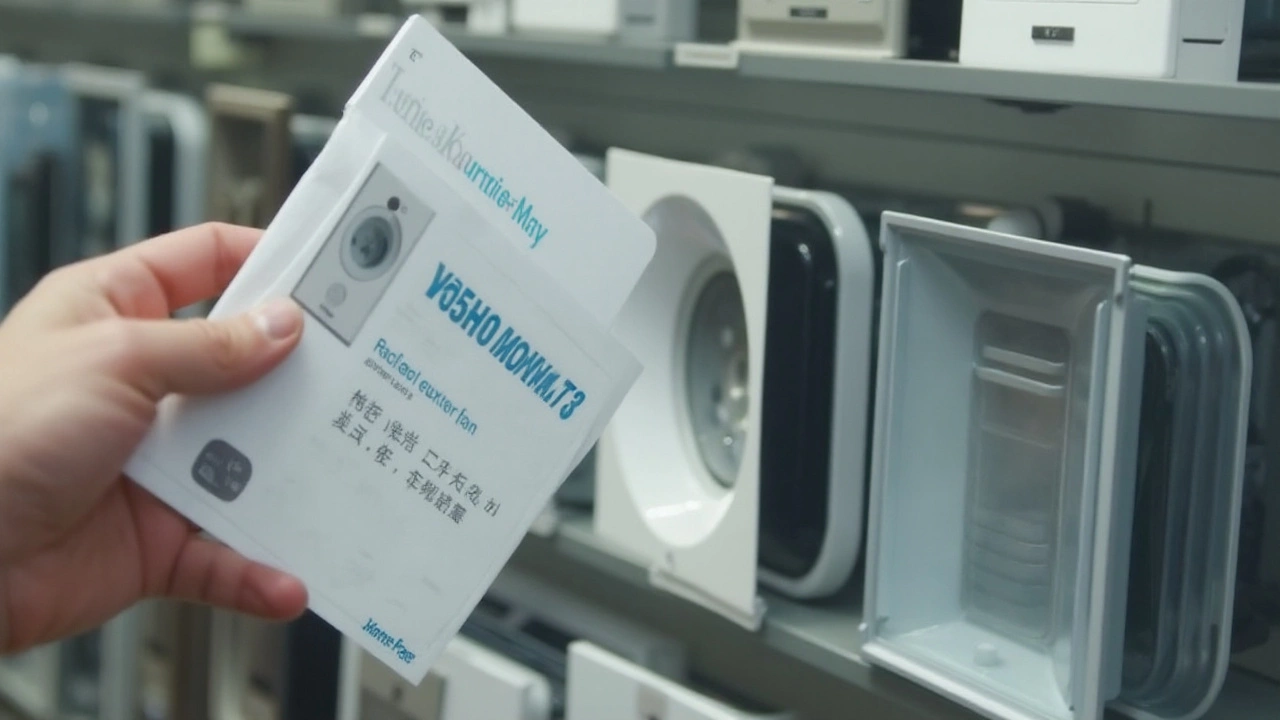
When it comes to finding the perfect replacement fan for your kitchen or bathroom, the variety of options might feel a bit overwhelming at first. The key is to start by considering the specifications of your existing extractor fan. Initially, match the basic dimensions, so the new unit fits seamlessly into the existing space without the need for extensive modifications. Modern extractor fans come in various sizes and designs, each crafted to suit different needs and aesthetic preferences. Look at the current extraction rate, typically measured in cubic meters per hour (m³/h), since this will give you a clear perspective on how powerful your replacement needs to be. If your kitchen tends to be smoky more often than not, opting for a fan with a higher capacity might be a wise decision.
Selecting the right type of extractor fan includes weighing between different functionalities. Wall-mounted, ceiling-mounted, and window-mounted fans are the conventional variants, each suited for different setups. Ceiling fans tend to work best for smaller, compact spaces while wall-mounted fans are common in larger, expansive kitchens. As a rule of thumb, box fans are generally preferred for rooms with open vent pathways. On the aesthetic side, while the traditional white and stainless steel bases seem functional, models with decorative lighting or sleek black glass can add a dash of elegance to modern kitchens and bathrooms. Aesthetics shouldn't outweigh performance, but finding a balance often feels like striking gold.
Another important aspect to consider is the noise level. Nobody wants an extractor fan that roars louder than the average kitchen conversation or disturbs a peaceful video call. Check the fan's decibel (dB) rating, where a range of 30 to 60 dB is commonly found. Modern fans also come equipped with sound-dampening technologies that minimize disruptions more effectively than older models.
"A quiet kitchen is a happy kitchen," remarked home improvement expert Bill McNeal during a 2023 interview, highlighting the importance of considering noise levels when choosing appliances.Safety features, such as thermal cut-off functions, are worth looking into as they prevent overheating by switching off the fan if a high temperature is detected.
Considering Energy Efficiency
As the world pivots towards more sustainable practices, energy efficiency remains paramount. Many extractor fans are labeled with energy ratings similar to those on refrigerators or washing machines. Choosing a fan with a high energy efficiency rating ensures not only a reduced carbon footprint but also savings on electricity bills over time. Energy-efficient fans often come with features like motion or humidity sensors, which auto-adjust the fan operation based on room conditions. Imagine stepping into a steamy bathroom after a hot shower and the fan intuitively escalating its speed to clear the air – that’s not just convenience but smart efficiency!Working with a Budget
Ultimately, every extractor fan purchase aligns with a budget, whether lean or lavish. Set your budget range before scouring catalogues or websites to avoid falling in love with an option out of reach. To guide spending, consider that mid-range extractor fans usually offer a balance of durability, efficiency, and design – they are the sweet spot for most homeowners. Don't hesitate to look for seasonal sales or promotions, often seen during spring renovation months when retailers clear stock for new models. Remember, the investment in a quality extractor fan pays off with its reliable operation and longevity.
Step-by-Step Installation Guide
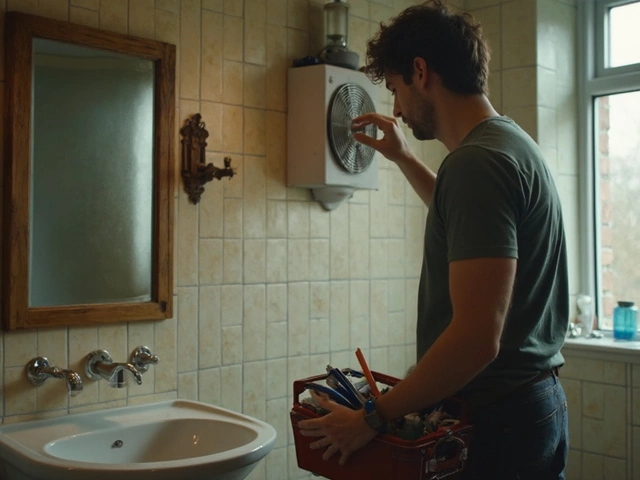
Tackling the task of extractor fan replacement might seem like venturing into uncharted territories, but fear not. Let's break it down into manageable, executable steps. The first step in replacing your extractor fan is gathering the necessary tools and materials. A screwdriver, voltage tester, and possibly a drill will be your primary allies. Ensure you also have your replacement fan unit at hand—preferably one that matches the specifications of your old appliance to make the transition smoother.
Once you're armed with your tools, it's crucial to ensure safety by switching off the power supply to the fan. Use your voltage tester to double-check there's no lingering current. It's always better to be cautious at this stage, to avoid any unpleasant shocks. With the area now safe to operate in, begin by removing the old fan casing. Unscrew the screws and gently tug the cover away, revealing the internal connections. Document the wiring setup, either mentally or with a quick picture, even the most experienced can appreciate a quick reference later.
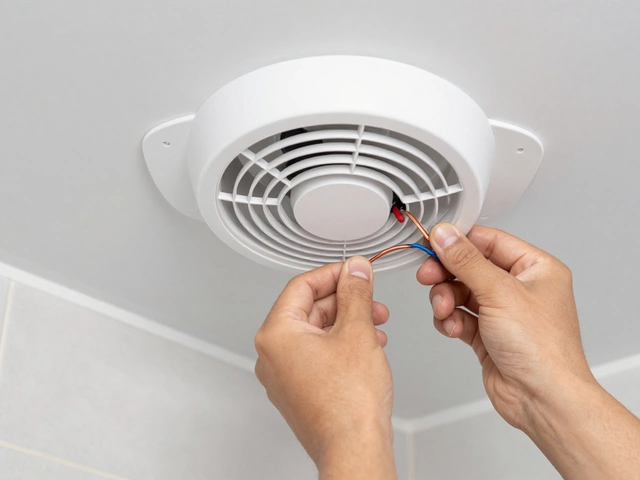
With the old fan's casing out of the way, you can tackle the wiring. Disconnecting the existing wires might require keen concentration. Altering the wiring configuration can lead to operational issues when the new unit is installed. So go ahead and mark them if the previous step of documentation didn't suffice. Carefully detach the old unit from its mount, preparing the way for the new fixture to grace the alcove. Clean any accumulated dust or debris from the area, setting a tidy stage for the next act.
Installing the new extractor fan involves reversing the earlier steps. Start by aligning and securing the new unit into the existing mount. Ensure it's firmly in place before attempting to reattach any wiring. Refer back to your quick reference photo or notes, connecting each wire to its corresponding terminal. A misplaced wire could lead to a non-functioning fan or, worse, a safety hazard. Always double-check your work here. Once convinced the wiring is correct, it's time to restore power and test your handiwork. Engage the power supply and cautiously switch the fan on. Should the dreaded silence ensue, retread your steps to find the pesky culprit.
A successful replacement should result in a fan that operates quietly and efficiently. With the whirring satisfaction of a job well done, any remaining doubts should evaporate. Remember, each installation will slightly differ based on specific models and bathroom or kitchen layouts. It's always prudent to keep the manufacturer's guidelines during the process to ensure compatibility and warranty considerations. If a tangled wire or perplexing instruction book stumps you, reaching out to a professional might just be the best course.

Safety Tips and Troubleshooting
Embarking on an extractor fan replacement journey not only demands an adventurous spirit but an acute awareness of safety. Safety should always be the forefront consideration, as improper handling can lead to mishaps. Before we unscrew even a single bolt, ensuring that the power supply to the unit is completely cut off is an absolute must. It's surprising how often this step is overlooked, leading to avoidable accidents. For that, locate your home's primary circuit breaker and switch off the relevant power source. Verify that no power is coursing through the unit before getting hands-on. Double-check and even triple-check if you must, because no task is worth compromising your safety.
When working with tools, especially electricity-centric equipment, the right gear is essential. You wouldn’t want to be caught with the wrong screwdriver or worse, a non-insulated tool. Insulated screwdrivers should be your go-to, preventing any stray voltage from potentially turning a fix into a fiasco. Moreover, a trusty pair of safety glasses can be the unsung hero in protecting your eyes from dust or any unexpected debris that might pop out mid-replacement. A well-lit workspace can do wonders too, allowing you to spot and manage those small but significant details that are easily missed in dim light. Illuminate your workspace as if it were a stage, and you the star performer.
Should the fan exhibit issues even after installation, there are several common troubleshooting measures to consider before throwing in the towel. First, ensure that the unit is correctly mounted and secured in place. A rattling sound can imply loose screws, which could compromise both safety and function. If the fan fails to spin, inspecting the wiring connections should be your next step. A slight misalignment or a loose connection can often lead to a fully operational fan appearing dead. In case the issue persists, evaluating the fan motor with a multimeter can offer insights. It’s an interesting fact that about 15% of fan problems arise from faulty motors, an essential tidbit shared by home maintenance experts.
“A well-maintained fan ensures the right balance between energy efficiency and optimal performance, saving users both money and unwanted stress,” notes Graham Taylor, a renowned home repair specialist.
Another layer of troubleshooting involves the ventilation path itself. Sometimes, the blockage isn’t within the fan but in the ductwork. Ensure there’s no obstruction or lint accumulation that’s crept in over time. Employing a flexible brush to gently clear these areas can rejuvenate airflow, often bringing dormant extractors back to life. Being mindful of regular maintenance checks, such as cleaning inlet grills and replacing filters, can prevent a recurrence of these common problems. Explore these methods diligently, and you might never have to face a new extractor fan disaster again.