If your kitchen smells like a sauna after a big meal, the extractor fan is probably not doing its job. A weak or noisy fan can ruin cooking comfort and even cause mould. The good news? Most fan problems are easy to spot and many can be solved without a pricey call‑out.
First, check the basics. Is the fan turned on? Does the switch work? Is the filter clogged with grease? A dirty filter reduces airflow dramatically, so give it a quick clean or replace it if it’s worn. Most fans have a removable mesh that you can wash with hot soapy water – let it dry completely before re‑installing.
When cleaning isn’t enough, you might need a new fan. Replacing a kitchen extractor fan yourself takes about an hour and a few tools: a screwdriver, a drill (if you need new mounting holes), and a ladder or sturdy step stool. Follow these steps:
1. Turn off the power at the circuit breaker – never rely on the wall switch alone.
2. Remove the old fan. Most units are held by a few screws and a metal bracket. Carefully disconnect the wiring – note which wires go to which terminals or snap a photo for reference.
3. Fit the new fan. Align the mounting bracket with the ceiling or cabinet opening, secure it with screws, and connect the wires using the same colour code (usually live, neutral, and earth).
4. Seal any gaps with silicone sealant to keep steam from leaking into the ceiling.
5. Switch the power back on and test the fan at low, medium, and high speeds. If it runs smoothly and pulls air efficiently, you’re done.
Our guide “How to Replace a Kitchen Extractor Fan Yourself” walks you through each step with photos and safety tips, so you won’t miss a detail.
Some issues are best left to a qualified tradesperson. If you notice any of these signs, call an expert:
Qualified electricians or specialized ventilation technicians have the tools to test motor windings, replace sealed units, and ensure everything complies with UK safety regulations. Our article “Who Repairs Extractor Fans?” explains which tradespeople have the right skills and how to choose a reputable service.
Another consideration is the fan’s lifespan. Most kitchen extractors last 8‑12 years. If your fan is older, even a perfect repair might only be a stop‑gap. The piece “Extractor Fan Replacement: How Often Should You Change Your Kitchen or Bathroom Fan?” helps you decide whether a replacement is smarter than a repair based on age, performance, and energy efficiency.
Regular maintenance makes a huge difference. Clean the filter every 1‑2 months, wipe the housing with a damp cloth, and check the vent duct for blockages. A quick once‑a‑year inspection of the ductwork can prevent ice‑build‑up in cold months and keep the fan humming quietly.
Bottom line: a well‑maintained extractor fan saves you time, money, and kitchen drama. Start with a basic cleaning, move to a DIY swap if needed, and know when to call a pro. With these tips, your kitchen will stay fresh and your cooking will stay enjoyable.

Discover how long extractor fans last, what shortens their life, and tips to maximize their lifespan in your kitchen or bathroom. Practical, clear advice from real experience.

A reliable heat pump is essential for maintaining comfort in your home. Some signs indicate that your heat pump might need replacing, such as increased energy bills, inconsistent temperatures, strange noises, old age, and frequent repairs. Understanding these warning signs can help you decide if it's time to invest in a new system.
Dealing with a water heater that keeps tripping can be a headache—hot water one minute and a cold shower the next. This article breaks down the most common reasons for this irritating problem, giving you clear steps for figuring out if it’s a simple DIY fix or if you should call in a pro. You’ll get straight talk, not complicated jargon or long-winded explanations. Learn what to check, what parts usually fail, and when your water heater might just be on its last leg. Get the confidence to handle the problem and save yourself a ton of hassle.

Thinking about replacing your electric oven on your own? This article breaks down what you need to know about doing it yourself— from basic safety to common pitfalls. Learn how tricky the process can get, which tools you might need, and when it's smarter to call a pro. Get tips to save money and avoid kitchen disasters. Designed for anyone who values a good meal and a working oven.

Struggling with a kitchen extractor fan that's lost its power? This guide explains how to find and fix common blockages that cause bad smells and poor airflow. Learn step-by-step how to safely clean your fan and make it work like new, plus get handy maintenance tips to stop future clogs. We break down the process so you don't need tools or special skills. Get your kitchen back to normal without calling in an expert.
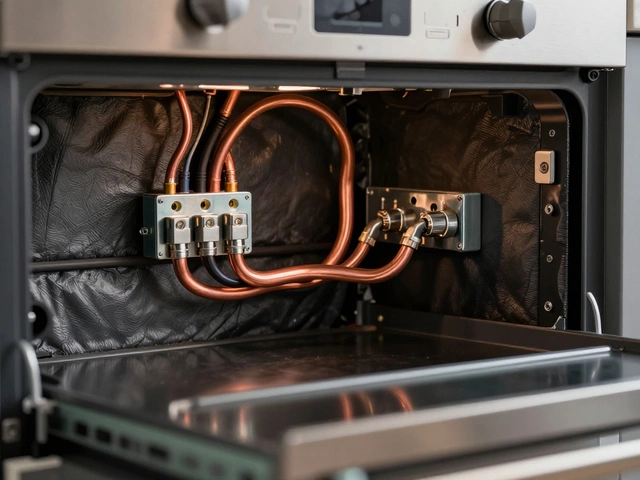
Discover whether you can replace an electric oven yourself or need to hire a professional. Learn about voltage requirements, safety risks, and legal building codes for appliance installation.