If your extractor fan has gone silent or is sputtering, you don’t have to live with stale air. Most fans fail because of dust, a loose connection, or a worn motor – all fixes you can tackle in an hour with basic tools. Below you’ll find the most common reasons fans quit, a step‑by‑step repair guide, and clear signs when it’s time to call an electrician or a ventilation expert.
First, check the obvious. A clogged filter or a build‑up of grease on the blades can stop airflow and make the motor overheat. Next, look at the power side: a tripped circuit breaker, a loose plug, or a dead switch are quick fixes. Lastly, the motor itself may be humming but not turning – that usually means the bearings are worn or the fan’s capacitor has gone bad. Knowing which of these three groups (cleaning, electrical, motor) is causing the issue will save you time.
1. Safety first. Turn off the circuit at the fuse box and unplug any detachable cords. Lay a towel on the floor to catch any drips.
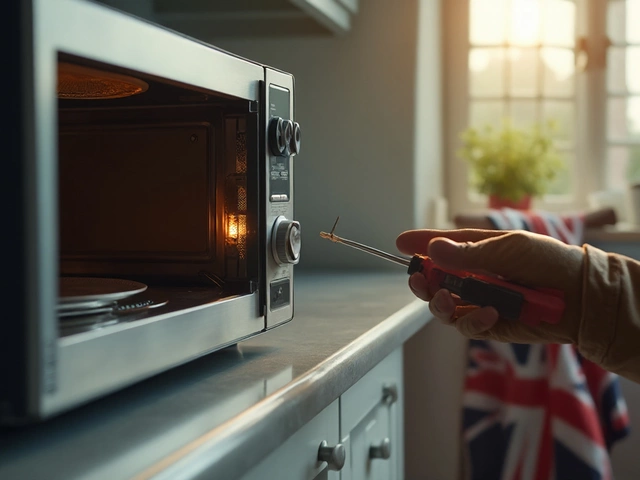
2. Remove the cover. Most fans have a few screws on the front grille. Unscrew them, pull the cover off, and set it aside.
3. Clean the blades and filter. Use a soft brush or an old toothbrush to scrub away grease and dust. If the fan has a metal mesh filter, soak it in warm, soapy water for ten minutes, then rinse and dry.
4. Test the wiring. With the fan still off, check the wires for loose terminals. Tighten any loose screw connections and look for any blackened or frayed insulation. If you see damage, replace the wire or call a qualified electrician.
5. Spin the motor. Gently turn the fan blade by hand. It should move freely. If it sticks, spray a little light oil on the bearings. If it still won’t turn, the motor may need a new capacitor – a small, inexpensive part that you can swap out.
6. Re‑assemble and test. Put the cover back, screw it in, restore power, and flip the switch. You should hear a steady hum and see airflow. If the fan runs but is noisy, the blades might be misaligned; tighten any loose screws on the blade hub.
If any of these steps feel beyond your comfort level – especially dealing with wiring or motor parts – it’s wise to call a professional. An electrician can safely check the circuit, while a ventilation specialist will know the exact replacement fan model for your space.
Remember, regular maintenance makes future fixes easier. Clean the filter every month if you cook often, and give the fan a quick visual check each season. A well‑maintained fan lasts years, saving you both hassle and the cost of a full replacement.
So next time your kitchen or bathroom feels stuffy, you now have the tools and confidence to fix the extractor fan yourself. A few minutes of work, a little cleaning, and a safe check of the wiring can bring fresh air back to your home without a pricey service call.

Repairing an extractor fan can seem daunting, but with the right guidance and tools, it's a task that can be tackled with confidence. This article walks you through the essential steps of diagnosing common issues, the tools needed for basic repairs, and tips for maintaining your fan in top condition. Whether in a kitchen or bathroom, keeping your extractor fan functional ensures optimal ventilation and air quality. Learn when a repair is possible and when it might be time to seek professional help.

Fixing an extractor fan can be a straightforward process if approached with the right tools and knowledge. This article delves into various factors affecting repair time, common issues encountered, necessary tools, and preventive tips to maintain optimal performance. Readers will discover useful advice on diagnosing problems and learn how to efficiently address and resolve them, ensuring a smooth and fresh airflow in kitchens and bathrooms.

When your fridge stops cooling, it can be a real worry, especially with all that food at risk. Before you call the repairman, there are a few steps you can try yourself to bring your refrigerator back to life. From checking the thermostat settings to cleaning coils and examining door seals, you might find that a simple DIY fix does wonders. Understanding how these appliances work can also help prevent future hassles. This guide will walk you through the essential tips and tricks to get your fridge cooling again.
Learn fast how to spot a blown microwave fuse, test it safely, and replace it yourself. Step‑by‑step instructions, tools needed, and common pitfalls covered.
Choosing an oven that stands the test of time goes beyond looks and price. This article delves into which oven brands are celebrated for their durability. We'll explore how build quality, materials, and innovative technologies play a role in longevity. Plus, you’ll get insider tips on maintaining your oven for years to come. Discover how to make a smart choice today that benefits you tomorrow.

Discover how to ensure your water heater is in proper working condition with this detailed guide. Learn to identify signs of malfunction, perform essential maintenance tasks, and understand common issues that may arise. Whether it's electric or gas, having a reliable water heater is crucial for every home. Keep your heater running smoothly with practical and safety-focused advice.

Got an appliance that isn’t working right? The way you describe it can make or break your service experience. This article breaks down how to explain what’s wrong with your appliance, what details really matter, and how to avoid confusion. Learn which features, model numbers, and problem signs technicians care about. Save time and frustration on your next repair call.