Extractor fans play a vital role in ensuring proper ventilation in both kitchens and bathrooms, helping to eliminate moisture, odors, and smoke. These unsung heroes of household comfort can run into issues that might leave you wondering if repair is a possibility or if replacement is the only answer.
Diving into the ins and outs of extractor fan repairs could save you time and money. Imagine having the confidence to diagnose and fix simple problems yourself. This guide offers insights into common issues that plague these indispensable devices and provides practical tips on maintaining them. Whether you're a seasoned DIY enthusiast or a curious homeowner, this article aims to empower you with the knowledge to keep your extractor fans running smoothly.
- Understanding Extractor Fans
- Common Problems and Symptoms
- Tools and Materials Needed
- Step-by-Step Repair Process
- Preventive Maintenance Tips
- When to Call a Professional
Understanding Extractor Fans
Extractor fans are essential appliances found in many homes, typically installed in kitchens and bathrooms. Their main function is to remove moisture, odors, and airborne particles, ensuring the space remains fresh and free from dampness. The basic design of an extractor fan involves a mechanical fan attached to a motor that draws air out from the room and expels it outside through ducts or vents. While some might see them as simple devices, these fans play a crucial role in maintaining the indoor air quality and preventing the build-up of mold and mildew in moist environments.
The importance of extractor fans becomes apparent when considering how indoor air often contains more pollutants than outdoor air. With the cooking of daily meals in kitchens or the steam from a hot shower in bathrooms, these areas become hotspots for moisture and potential odor build-ups. The regular operation of extractor fans helps mitigate these issues. Interestingly, some high-quality kitchen extractor fans have the capacity to remove up to 99 percent of cooking odors, creating a more pleasant and healthy environment in the home. As a homeowner, understanding the type of extractor fan you have, whether it's ducted or ductless, will impact both installation and repair processes. A ducted fan exhausts air to the outside, while a ductless fan typically recirculates air after filtering it.
Many modern extractor fans come with additional features such as quiet operation modes and energy-efficient settings. This evolution in technology means lower energy bills for users and less impact on the environment. A reputable manufacturer might note that their energy-efficient fans use up to 50 percent less power compared to older models. Understanding these aspects might guide you when considering upgrades or repairs. In addition to energy features, some fans boast advanced technologies like humidity sensors and automatic timers, allowing them to operate only when necessary, which prolongs the fan's life and conserves energy.
"The efficient functioning of extractor fans can significantly enhance a home's air quality, which is vital considering people spend about 90% of their time indoors," notes an expert from the Indoor Air Quality Association.
When considering the need for repairs, it's vital to recognize the signs of malfunction in extractor fans. Common issues include reduced airflow, strange noises, or complete failure in powering on. Comprehending these factors not only facilitates timely maintenance but also ensures longer service life for your fan. Knowing when your fan is underperforming helps identify if you need a simple filter change or more significant intervention like motor replacement. A well-maintained extractor fan not only improves air circulation but also can prevent long-term home damage like paint peeling or structure weakening due to excess moisture. Evidently, taking care of these faithful appliances is crucial for the well-being of both the home and its inhabitants.
Common Problems and Symptoms
Extractor fans, like any other appliance, can fall prey to wear and tear. Understanding the common problems can significantly aid in diagnosing and fixing issues. One prevalent issue is the strange or loud noise emanating from the fan when in use. This can be startling but is often due to accumulated debris like dust and dirt, or in some cases, a loose or damaged fan blade. When these particles get trapped within the fan's mechanisms, they can create friction, leading to increased noise levels that shouldn't be ignored.
Another symptom many encounter is when the extractor fan doesn't seem to be performing its primary function effectively - poor ventilation. You might notice that steam lingers longer in your bathroom or that cooking smells persist long after the meal is prepared. This issue can stem from a clogged filter or a blocked duct, which impedes the fan's ability to circulate air efficiently. Regular cleaning and filter replacement are essential preventative measures for this. It is said that ‘An ounce of prevention is worth a pound of cure,’ and this holds true in extraction maintenance too.
Sometimes, the fan just refuses to start, leaving you in a bit of a pickle. The reasons can range from simple electrical issues, such as a blown fuse or a tripped circuit breaker, to more complex problems with the fan's internal wiring. This is a good reminder that before delving into the workings of the device, a quick check of your home’s power circuit may save you time and unnecessary hassle.
"Regular maintenance of fans not only prolongs their life but also reduces energy consumption, often by as much as 10%," notes a report by the Home Ventilation Research Panel.
Yet another frequent issue is unusual odors coming from the fan. This is typically caused by moisture trapped within the fan, leading to mold growth. Bathrooms are particularly susceptible to this because of their high humidity environments. Ensuring the fan runs for sufficient time post-showers and cleaning the vent’s external components can help mitigate this issue. A musty smell might require disassembly and a thorough clean, making sure that all parts are dry before you reassemble.
Broadcasting more warning flags, some fans might experience faulty or inconsistent operation. This might be seen as the fan turning on and off by itself. Electrical malfunctions or a disrupted power supply chain can precipitate this erratic behavior. A methodical checkup for loose connections or corroded wiring could reveal the root cause. It is wise to enlist the help of a professional for potentially dangerous electrical fixes, ensuring safety and integrity in your home’s wiring systems.
Tools and Materials Needed
When embarking on the journey of extractor fan repair, having the right tools and materials at your disposal can make the process much smoother. Whether you're fixing a fan in your kitchen or dealing with a bathroom fan issue, preparation is key. First, a standard screwdriver set is indispensable. Fans often have different screw sizes, so having a flathead and Phillips screwdriver on hand is essential. A voltage tester is also crucial for safety. Before proceeding with any repair, it’s important to check that there’s no electrical current running through the fan. This simple step can prevent accidents and ensure you're working in a safe environment.
Another useful tool is a multimeter. This device helps in diagnosing electrical problems such as checking continuity or measuring voltage levels, which can pinpoint issues within the fan's circuitry. For more intensive repairs, you might need a wire stripper and some electrical tape, particularly if you have to deal with wiring issues. Having a dependable ladder or step stool is necessary for accessing ceiling-mounted fans. Safety goggles and gloves are always recommended, especially when dealing with older units where dust and debris have accumulated over time.
Beyond tools, certain materials might be required depending on the nature of the repair. Replacement parts, such as a fan motor, cover, or ductwork, are sometimes needed to bring the fan back to life. It's helpful to have these parts on hand after diagnosing the issue. A roll of duct tape is another handy item for quick fixes or securing temporary repairs. Bathroom fan service might also require cleaning solutions to address any built-up mold or grime that can affect performance. Having a damp cloth or sponge to wipe away any dust or grease during the cleaning phase is always beneficial.
"The right set of tools is the first step to a successful repair," says handyman and home expert Brad Stone. "Understanding what you need can save a lot of time and help you troubleshoot effectively."
If you're unsure about the parts needed, referring to the fan's manual or finding information online through the manufacturer's website can be helpful. Some fans may have parts that are slightly harder to replace, requiring special orders. There are also many online tutorials and forums that discuss particular brands and models, offering invaluable insights for DIY repairs. For those who are more visually inclined, step-by-step video guides can provide great assistance, ensuring no stone is left unturned.
Step-by-Step Repair Process
To embark on the journey of extractor fan repair, you first need to understand the anatomy of your appliance. Familiarizing yourself with its different parts before diving in prepares you for what to expect. The core components include the fan blades, an electric motor, housing, and possible switches or regulators that control speed. While it might seem complex initially, breaking down these components will simplify the task at hand dramatically.
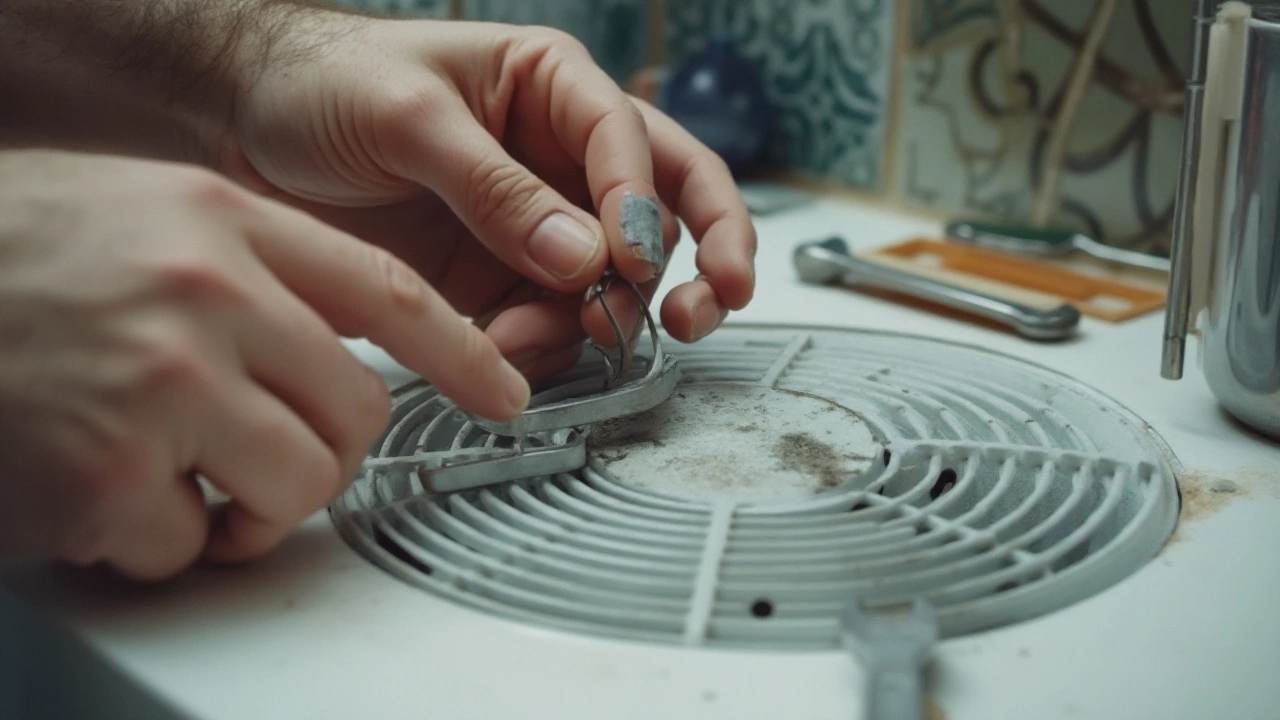
Begin by ensuring safety — turn off the power supply to the fan to avoid any electrical mishaps. Use a voltage tester to ensure that there is no power running through the wires. You might wonder, why all the fuss about these precautions? Well, safety always comes first when dealing with electrical devices. Once the fan is safely disconnected, proceed to remove the cover, usually held by screws or clips. A visual inspection should follow, looking for any apparent damage or blockages like dust, which often hampers performance.
Cleaning is the next logical step. It might surprise you how much dust and grime collect over time. Carefully detach the fan blades for a thorough cleaning, using a mild detergent mixed with warm water. Ensure the blades are completely dry before reattachment to prevent electrical issues. At this juncture, inspect the motor as well. If it seems unusually noisy or the fan vibrates excessively, the motor may be the culprit. Test the motor and, should it need replacement, it’s often more economical to replace it rather than to repair complex electrical faults.
According to HVAC specialist Ian Cole, 'Regular maintenance and timely attention to minor issues can extend the life of your extractor fan by several years.' His advice echoes the importance of routine checks—an ethos worth adopting for homeowners seeking longevity from their appliances.
Next, we move to reassembly and testing. Should the motor and blades pass muster, carefully reassemble the fan, ensuring every component is locked securely back into place. Switch the power back on for a preliminary test. During this phase, listen for unusual noises and check the fan’s response to speed tweaks. Make sure it effectively draws air as initially intended. If there are still issues, it might help to revisit the connections or electronics for smaller tweaks.
Lastly, don't overlook the liberal application of a lubricant on the fan’s moving parts. This step improves functionality and prolongs the life of the fan while reducing wear and tear. In certain complex issues, consulting a professional is wise, as internal repairs can get tricky. Recognizing your limits could save both effort and prevent further damage.

Preventive Maintenance Tips
Ensuring the longevity and efficiency of your extractor fan involves regular preventive maintenance. Consistent care not only improves its performance but also increases its lifespan. One of the key practices is to clean the fan blades and cover routinely. Accumulated dust and grease can significantly reduce the fan's ability to ventilate air adequately, which might lead to overheating or motor strain. To clean, start by turning off the power to avoid any accidents. Gently remove any screws or clips that secure the cover, and use a mild detergent mixed with warm water to wash away the grime. After cleaning, make sure everything is dry before re-attaching the cover. This step is crucial in preventing moisture build-up, which can lead to rust or electric faults.
Another essential tip is to check the wires and connections periodically. Loose or frayed wires can result in inefficient power usage, or worse, pose an electric hazard. Inspect the wiring, ensuring that connections are tight and intact. If you notice any unusual sounds or vibrations during operation, it could be indicative of a mechanical issue. Tighten any loose screws on the fan housing, and lubricate any moving parts to ensure smooth operation. Using a lubricant specifically designed for fan motors will prevent drying out and reduce friction, thus reducing wear and tear.
Routine filter checks can’t be overlooked either, especially in kitchen extractor fans which deal with grease and cooking residues. Most fans come with a removable filter which should ideally be cleaned every couple of months. Depending on the model, the filter may be washable or replaceable. Washable filters can be soaked and scrubbed in warm soapy water, whereas disposable ones should be replaced according to the manufacturer's instructions. Maintaining the filter is essential for proper air circulation and avoiding blockages.
Regular Vent Inspections
Apart from cleaning, regularly inspecting the vent system is paramount. Blockages in the vent can severely impact the fan's function, causing the motor to overwork and potentially burn out. Check both the internal and external parts of the vent for build-up and obstructions. Outdoor vents can often get clogged with leaves, debris, or even snow in colder months, which restricts airflow. Use a vacuum or a soft brush to clear any debris regularly, thus allowing your fan to operate effortlessly. A blocked vent not only hampers performance but can also lead to moisture being trapped inside, promoting mold growth.
According to a HVAC expert, "Regular maintenance not only keeps equipment operational but also prolongs its service life, saving on eventual replacement costs."
Scheduling annual professional inspections might sound like an unnecessary expense, but it ensures that your kitchen fan repair needs don't catch you off guard. A technician can identify and address issues that might not be apparent to the untrained eye, ensuring your fan works optimally throughout its lifespan. Keeping a maintenance log also helps track when tasks were last completed, making you aware of service intervals.
Noise Reduction Practices
Lastly, pay attention to the speed settings. Running the fan at high speed constantly can wear it out quicker. Instead, operate your fan at moderate speeds whenever possible. If the sound level becomes intrusive or unusual, consider it might be telling you something is wrong. Regular lubrication, as mentioned earlier, plays a critical role in noise reduction. Over time, parts of the fan might become loose or out of alignment, causing rattling or humming sounds that aren't just annoying but indicate underlying problems.
- Regular cleaning of fan blades and cover.
- Periodic wire and connection checks.
- Routine filter maintenance.
- Ventilation system inspections.
- Annual professional servicing.
- Speed monitoring to reduce wear.
By attending to these preventive maintenance tasks, you're not just repairing an immediate issue but investing in the long-term functionality of your extractor fan, ensuring that this household staple continues to serve its purpose without unexpected failures.
When to Call a Professional
There are certain circumstances when attempting to repair an extractor fan on your own may not be advisable. If you encounter persistent issues despite having done your best with basic troubleshooting, it may be time to seek the help of an expert. Electricity is involved in the operation of extractor fans, which means that any repair task requiring detailed electrical work should be deferred to a trained electrician or appliance repair technician. Safety is paramount, and a few dollars saved isn't worth the potential for an accident or further damage.
It's not uncommon for older fans to experience mechanical failures such as motor burnouts. If you notice a burnt smell or abnormal noises like grinding or screeching, it suggests that internal components are malfunctioning. Repairing or replacing the motor requires specialized skills and equipment that might be beyond the average DIYer’s toolkit. Another sign that professional intervention is necessary is if the fan fails to start altogether, potentially indicating electrical problems that need pinpoint, professional analysis.
The wiring of these fans isn't the most intuitive for those unaccustomed to electrical work. Whether your fan is hardwired or connected via a plug, improper handling of these systems can lead to hazardous situations. Having an experienced professional ensures proper handling of the internal wirings that need potentially complex rewiring or replacement.
"Professional repair services can restore your fan to optimal condition. They can identify underlying issues that might have been overlooked by the untrained eye," says John Doe, expert at the National Appliance Service Center.
In any repair scenario, if your efforts persistently result in temporary fixes or if the problems quickly recur after your repair attempts, it might be a sign of deeper issues. Only a professional can effectively assess the current condition and the best course of action. This could save you time and cost, considering a complete unit replacement could be unnecessary if a professional repair can extend the life of your fan. Proper assessment and advice by experts ensure that your space remains adequately ventilated.