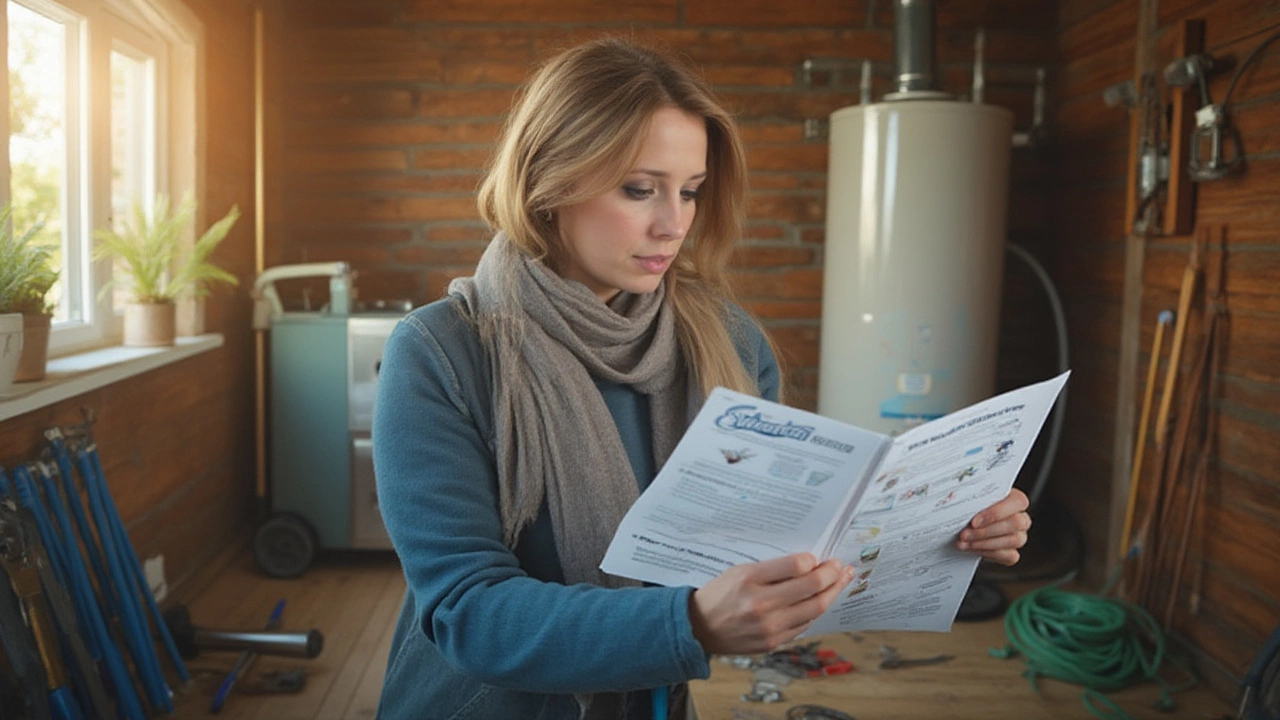
If your hot water feels lukewarm or you hear rumbling noises, it’s probably time to flush the tank. A build‑up of sediment reduces efficiency, hikes energy bills, and can shorten the heater’s life. The good news? You don’t need a plumber for a basic flush – just a few tools and about an hour.
Most experts recommend flushing every 12 months, but hard‑water areas may need it twice a year. Look for these signs: cloudy water from the tap, strange noises, longer recovery times, or a noticeable rise in your heating bill. Ignoring sediment can cause the burner to overheat, leading to costly repairs or a premature replacement.
1. Gather tools. You’ll need a garden hose long enough to reach the drain, a bucket, adjustable pliers, and a flat‑head screwdriver. Turn off the power or gas – electric heaters require the breaker off, gas units need the thermostat set to ‘off’ and the gas valve closed.
2. Shut off the water supply. Locate the cold‑water inlet valve on top of the tank and turn it clockwise until it stops. This stops fresh water from entering while you drain.
3. Connect the hose. Attach one end of the hose to the drain valve at the bottom of the tank. Run the other end to a floor drain or outside where hot water can safely flow.
4. Open the drain valve. Using pliers, carefully open the valve. Let the water run until it looks clear. If it’s still brown or gritty, pause, close the valve, and let the tank sit for a few minutes to let sediment settle, then resume draining.
5. Flush with fresh water. Once the water runs clear, keep the drain valve open and briefly open the cold‑water inlet. Fresh water will swirl through the tank, loosening any remaining particles. Let it run for about a minute, then close the inlet.
6. Close and refill. Shut the drain valve, disconnect the hose, and remove the bucket. Turn the cold‑water supply back on – you’ll hear the tank fill. When the water runs steady from the nearest faucet, the tank is full.
7. Restore power or gas. For electric units, flip the breaker back on. For gas, turn the gas valve to ‘on’ and relight the pilot if needed. Set the thermostat to your desired temperature.
Give the heater a quick check after a few minutes to ensure everything is running smoothly. You should notice hotter water and quieter operation.
Common mistakes to avoid: Never open the drain valve while the heater is still full – it can cause water hammer. Don’t forget to turn off the power or gas; hot water can cause electric shocks or gas leaks. If the hose leaks, tighten the connections before you start.
Regular flushing is one of the cheapest ways to keep your water heater efficient. It extends the unit’s life, saves energy, and prevents surprise cold showers. Keep a simple schedule in your home maintenance log, and you’ll avoid costly repairs down the road.
Ready to try it? Grab a hose, follow these steps, and enjoy steady hot water without waiting for a technician. Your wallet – and your shower – will thank you.
Wondering if you can flush your water heater yourself? Learn the step-by-step process, tools you'll need, and expert tips to extend your water heater's life.

A malfunctioning freezer can be a headache, particularly when it involves the compressor. Understanding whether it's worthwhile to replace a compressor requires consideration of several factors, including cost, age, and efficiency. This article breaks down the key elements for deciding if compressor replacement is the best route. With practical advice and insider tips, you'll gain clarity on making an informed decision for your appliance.
Choosing a reliable washing machine can be a daunting task given the numerous options available. This article provides insights into brands known for fewer repair issues and shares tips to maintain and extend the washer's lifespan. With technological advancements and design improvements, knowing how to select a durable washer can save time and money. Learn about the top performing washer brands based on recent studies and consumer reports. Also, discover interesting ways to keep your machine running smoothly.

Learn when it's safe to press the water heater reset button, step‑by‑step instructions, common risks, and when to call a professional.

Thinking about swapping out your electric oven? This article covers how tough the job really is, where people usually get stuck, and what you actually need to know. We break down what tools you really need, what pitfalls you can avoid, and when you should probably call someone who’s done it before. Get ready for straight talk—no tech jargon, just real advice for regular folks. Whether you DIY or call a pro, you’ll walk away ready to make a smart decision.
Wondering how long a washing machine should actually last? This article breaks down real averages, points out what causes washers to wear out, and shows simple ways to get more years out of your machine. We’ll look at red flags for replacement, compare old versus new models, and clear up some common myths about washers. If you want your next laundry day to go smoothly—or you’re tired of surprise breakdowns—this guide’s for you.