Oven Control Board Diagnostic Tool
Select the symptoms you are experiencing to determine if your oven control board needs replacement.
Analysis Result
Recommended Next Steps:
Your oven suddenly stops working, or worse, it starts behaving erratically. The display flickers, the temperature won’t hold, or the oven refuses to turn on at all. Before you call a technician or order an expensive replacement part, you need to know if the culprit is actually the oven control board, which is the electronic brain that manages power distribution, temperature regulation, and user interface commands in modern ovens. Misdiagnosing this component can save you hundreds of pounds and hours of frustration.
The control board, often called the main control panel or electronic control unit (ECU), sends signals to the heating elements, fans, and door locks. When it fails, the symptoms are usually distinct from other common issues like a broken thermostat or a faulty heating element. Identifying these specific signs requires looking beyond simple "it doesn't work" observations to understand how the electronics communicate with the hardware.
Key Takeaways
- Flickering displays and unresponsive buttons are primary indicators of control board failure, especially if they persist after resetting the oven.
- Erratic heating patterns, such as overheating or failing to reach set temperatures despite working elements, point to signal processing errors on the board.
- Burning smells or visible scorch marks on the back panel indicate electrical shorts or component burnout within the circuitry.
- Error codes like F9, E15, or H10 (varies by brand) often specifically reference communication failures between the board and sensors.
- Visual inspection for bulging capacitors, burnt traces, or corrosion can confirm hardware damage without specialized tools.
Understanding the Role of the Oven Control Board
To diagnose the problem accurately, you first need to understand what the control board does. In an electric oven, the control board acts as the central processor. It receives input from your touchpad or knobs, interprets those commands, and then sends precise voltage signals to the relay switches that power the heating elements. It also monitors feedback from the temperature sensor (thermistor) to adjust the heat output dynamically.
If the control board is healthy, the oven heats evenly, maintains temperature, and responds instantly to user inputs. If the board degrades, these communications break down. This isn't just about software glitches; physical components like relays, capacitors, and microprocessors wear out over time due to heat exposure and power surges. Unlike mechanical parts, electronic boards don't always fail completely-they often exhibit intermittent behavior before total shutdown.
Top 5 Signs Your Oven Control Board Is Failing
Recognizing the symptoms early prevents further damage to connected components. Here are the most reliable indicators that your control board needs attention:
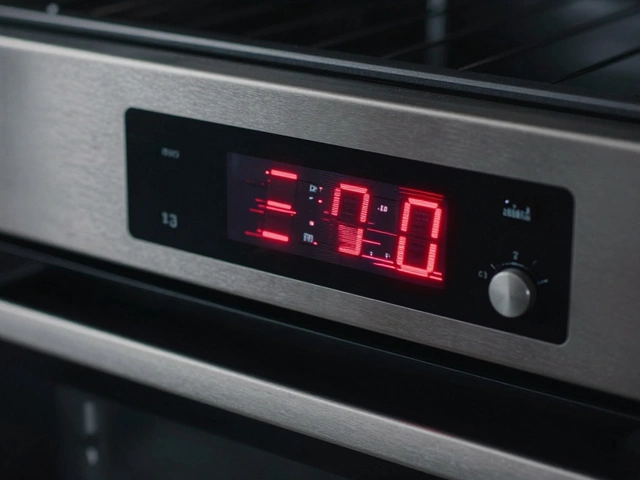
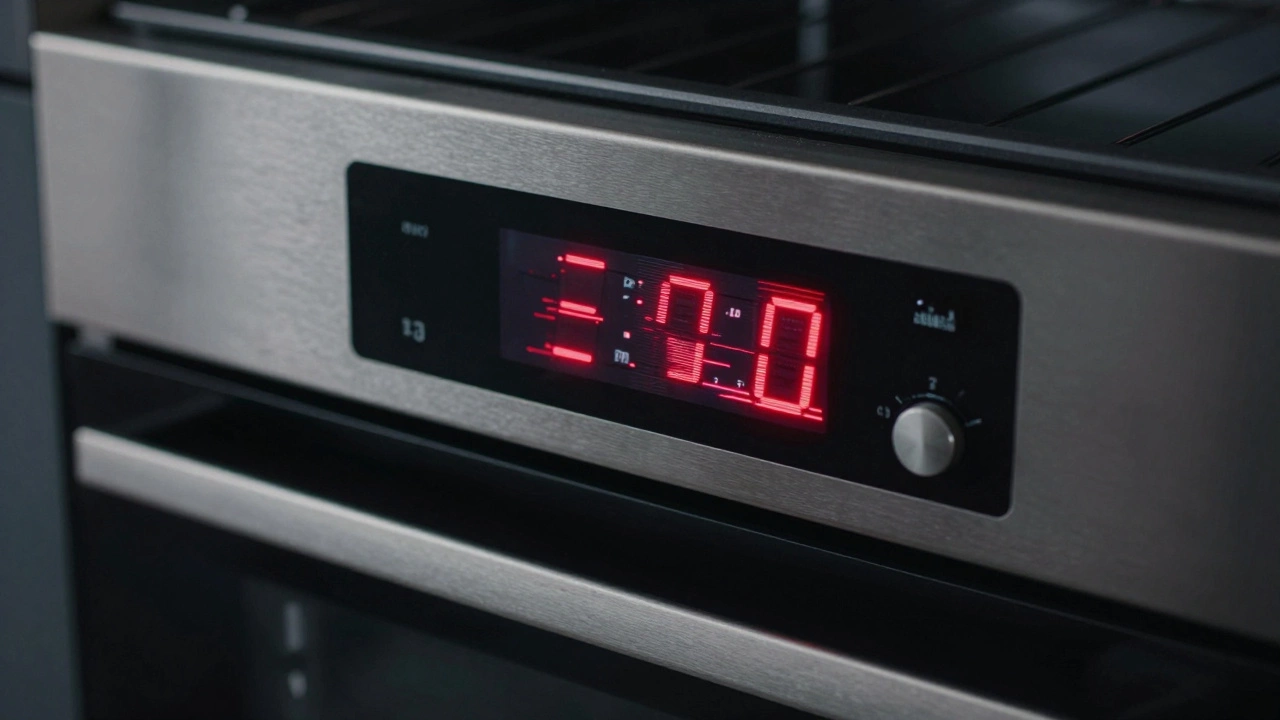
- Unresponsive or Glitchy Display: If the digital clock resets frequently, numbers appear missing segments, or the screen flashes randomly, the issue likely lies in the display driver circuit on the board. Try unplugging the oven for five minutes to reset the memory. If the glitch returns immediately upon plugging back in, the board is suspect.
- Oven Won't Turn On at All: While a tripped breaker or blown fuse could cause this, if the display lights up but no heating occurs when you start a cycle, the control board may be failing to send the "on" signal to the relays. Check if the fan runs; if the fan works but elements don't, the board's heating relays are likely dead.
- Inconsistent Heating: Does the oven get too hot, then shut off prematurely? Or does it struggle to reach 180°C even after an hour? This suggests the board isn't correctly interpreting data from the temperature sensor. A faulty sensor causes similar issues, but if the sensor reads correctly (you can test resistance), the board is misprocessing the signal.
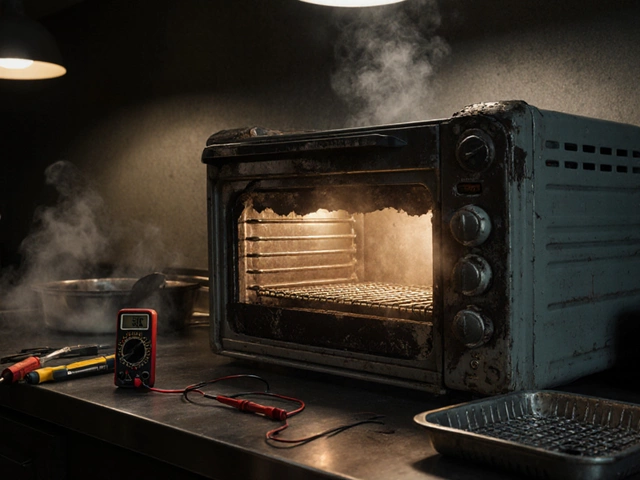
- Burning Smell or Smoke: A sharp, acrid smell coming from behind the control panel indicates burning insulation or melted plastic on the circuit board. This is a critical safety hazard. Inspect the rear access panel for blackened areas or melted components. If you see this, disconnect power immediately.
- Strange Noises: Clicking sounds from the back of the oven when trying to start a cycle often mean the relays on the control board are sticking or arcing. Healthy relays click silently; loud, repetitive clicking suggests internal electrical failure.

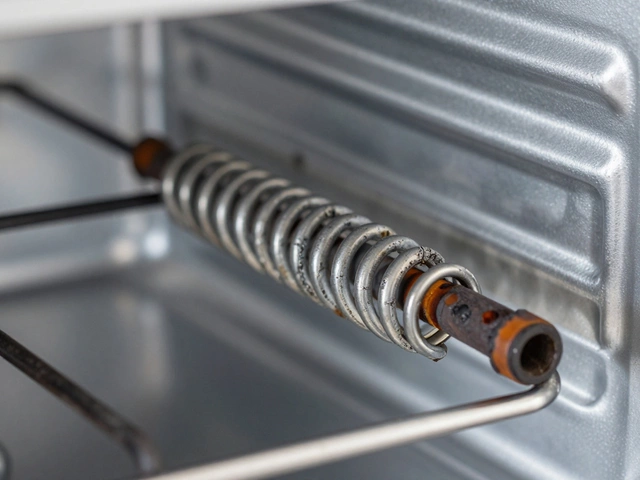
Visual Inspection: What to Look For Inside
Before ordering a replacement, perform a visual inspection. Safety first: ensure the oven is unplugged and cool. Remove the rear access panel or top cover to expose the control board. You're looking for physical evidence of failure.
| Symptom | What It Means | Action Required |
|---|---|---|
| Burnt Traces | Copper pathways on the PCB are charred or lifted. | Replace board immediately. |
| Bulging Capacitors | Cylindrical components look swollen or leak fluid. | Board failure imminent; replace soon. |
| Corrosion/Green Residue | Moisture damage causing short circuits. | Clean contacts or replace if severe. |
| Melted Connectors | Plastic wire terminals are warped or discolored. | Check wiring harness; board may need replacement. |
| Blown Fuse on Board | A small glass or ceramic fuse inside the board is dark/black. | Replace fuse only if root cause is identified. |
Pay close attention to the area around the relay switches. These handle high current loads and are prone to overheating. If you see discoloration near the screw terminals where wires connect, the board has likely experienced thermal stress. Even if it looks clean, microscopic cracks in solder joints can cause intermittent faults.
Distinguishing Between Control Board and Sensor Issues
A common mistake is blaming the control board when the temperature sensor is at fault. Both components interact closely, so their symptoms overlap. To differentiate, you need to test the sensor independently.
Use a multimeter to measure the resistance of the temperature sensor. At room temperature (around 20°C), most oven sensors read between 1,000 and 1,100 ohms. If the reading is infinite (open circuit) or zero (short circuit), the sensor is bad. However, if the resistance changes smoothly as you heat the probe with a hairdryer, the sensor is functioning. In this case, if the oven still behaves erratically, the control board is failing to process the correct resistance values.
Another clue: error codes. Many brands use specific codes for sensor vs. board issues. For example, Whirlpool ovens might show "F9" for a stuck key (board/interface issue) versus "F6" for a temperature sensor open circuit. Consult your model's manual for code meanings. If the code persists after replacing the sensor, the board is the next suspect.
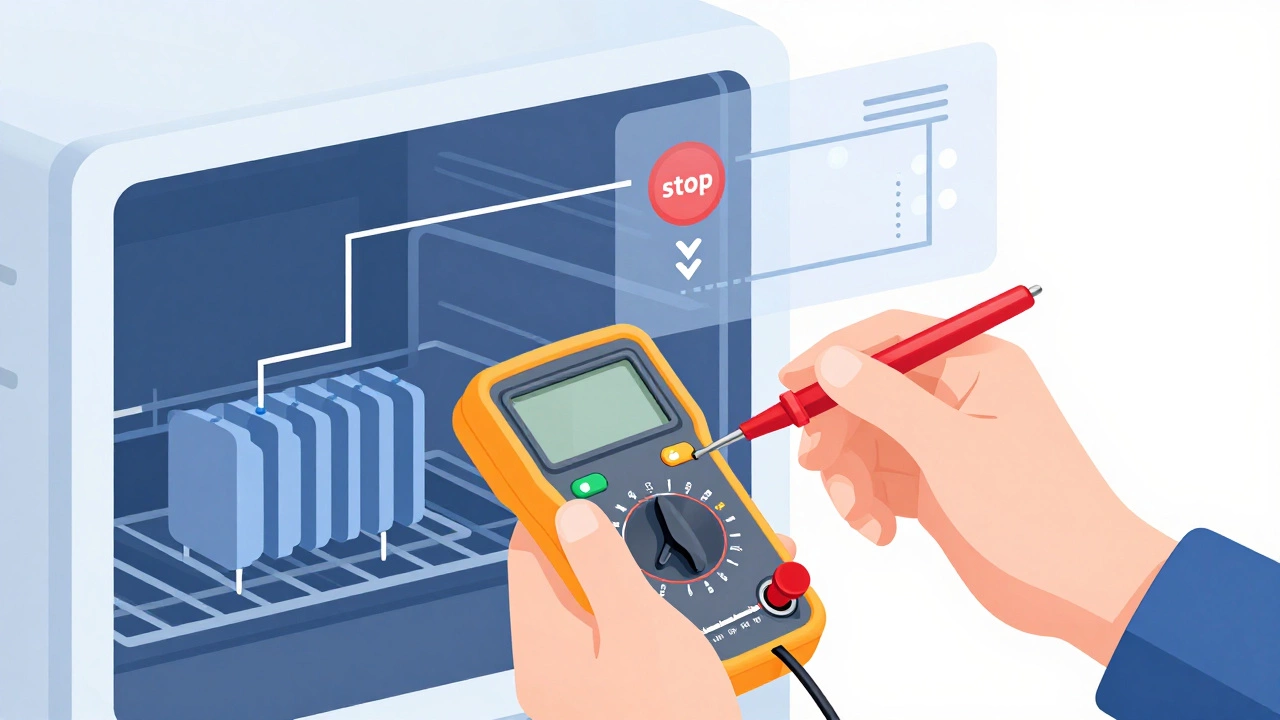
Testing the Control Board Without Replacement
You can perform basic continuity tests to verify if the board is sending power. Again, ensure the oven is unplugged. Locate the wires leading to the heating elements. Using a multimeter set to AC voltage, plug the oven back in carefully (use caution!) and monitor the voltage at the element terminals while starting a bake cycle.
If the display shows "Bake" and the temperature is set, but there is 0V at the element terminals, the control board is not closing the relay circuit. Conversely, if voltage is present but the element doesn't heat, the element itself is faulty. This test isolates the board's output function. Note: Only attempt this if you are comfortable working with live household voltage. Otherwise, skip to professional diagnosis.
When to Replace vs. Repair
Control boards are generally not repairable by homeowners. Soldering new components requires precision and understanding of circuit diagrams. Attempting DIY repairs often leads to permanent damage or safety hazards. Replacement is the standard solution.
However, before buying a new board, check for loose connections. Vibration over years can loosen wire harnesses. Re-seating all connectors might resolve intermittent issues. Also, inspect the door switch and interlock system. If the oven thinks the door is open, it won't heat-this mimics a board failure. Test the door switch for continuity. If it clicks and conducts, move on to the board.
Cost-wise, a genuine OEM control board ranges from £150 to £300 depending on the brand. Aftermarket options exist but may lack compatibility with proprietary features like convection fans or smart connectivity. Always match the part number exactly. Cross-referencing by model number ensures you get the correct firmware version.
Safety Precautions During Diagnosis
Working with oven internals involves risks. High-voltage capacitors can retain charge even after unplugging. Discharge them safely using an insulated screwdriver across the terminals before touching any components. Wear rubber-soled shoes and use insulated tools. Never bypass safety interlocks like the door lock mechanism.
If you smell smoke, see sparks, or notice melting plastic, stop immediately. Disconnect power at the circuit breaker. Do not attempt to restart the oven until inspected by a qualified technician. Electrical fires in appliances are serious and preventable with proper caution.
Preventing Future Control Board Failures
While control boards have a finite lifespan, you can extend theirs. Avoid power surges by using a surge protector on dedicated kitchen circuits. Keep the oven clean; grease buildup around the control panel can seep into vents and corrode connections. Ensure adequate ventilation around the oven to prevent overheating of internal electronics.
Also, avoid slamming the oven door. The impact stresses the hinge mechanism and can jar loose internal connectors over time. Regularly update firmware if your oven is smart-enabled, as manufacturers sometimes release patches for known control logic bugs.
Can I fix a bad oven control board myself?
You cannot repair the internal circuitry of a control board effectively. However, you can replace the entire board yourself if you are comfortable with basic electrical work. This involves removing the old board, transferring mounting brackets, connecting wires according to a diagram, and securing the new unit. Always disconnect power before starting. If unsure, hire a certified appliance repair technician.
How much does it cost to replace an oven control board?
The part itself typically costs between £150 and £300 for major brands like Bosch, Siemens, or Whirlpool. Labor charges for professional installation add another £80 to £120. Total costs rarely exceed £400 unless rare models require specialized programming. Compare prices online using your exact model number to find the best deal.
Why does my oven display keep blinking?
A blinking display often indicates a power interruption or a fault code. First, try resetting the oven by unplugging it for five minutes. If the blinking continues, check the error code pattern. Rapid blinking usually signifies a communication error between the control board and the display module or sensors. This points to a failing control board or loose wiring.
Is it safe to use the oven if the control board is acting up?
No. An erratic control board can cause overheating, leading to fire hazards or carbon monoxide risks in gas-electric hybrid models. It may also fail to engage safety locks, allowing the door to open during operation. Stop using the oven immediately until diagnosed and repaired.
How long do oven control boards last?
Most control boards last between 7 to 10 years under normal usage conditions. Factors like frequent power surges, poor ventilation, and heavy daily use can shorten this lifespan. High-end models with better cooling systems may last longer. Regular maintenance helps maximize longevity.