Noticed your kitchen getting steamier than a sauna lately? Maybe your extractor fan’s humming, rattling, or stopped working entirely. It’s a hassle, but here’s the thing: heaps of folks wonder if swapping out that greasy, underperforming extractor fan requires an expert, or if you can just do it yourself and save the callout fee. If you’ve poked around the internet or flipped through instruction manuals, you’ll see conflicting advice everywhere. Some claim it’s a cakewalk; others talk about the risks, from botched wiring to falling off kitchen stools. Let’s get right into the nitty-gritty: can you actually replace a kitchen extractor fan on your own? And if so, how do you do it right without frying your nerves—or your home’s wiring?
What You Should Know Before Swapping Out Your Extractor Fan
First up, a kitchen extractor fan isn’t just a whirring gadget sucking up bacon fumes. It’s part of your home’s ventilation system, pulling away moisture, smoke, and odours before they grime up your walls. There are a couple main types: recirculating fans (which blow filtered air back into your kitchen) and ducted fans (which chuck air outside through a vent). Swapping one for the same type is usually simpler, but switching types may mean cutting a bigger hole or running new ducting, which can be a pain.
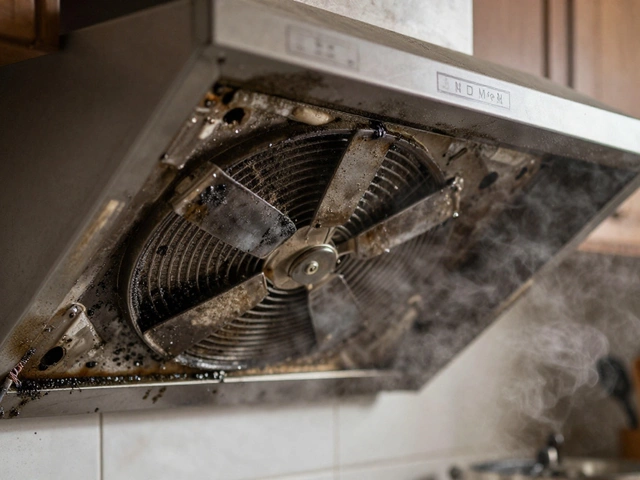
Why bother replacing the fan at all? Well, according to a 2023 survey by Which?, the leading reasons were noisy operation, poor extraction, and complete failure. Ignoring a busted fan can actually leave you with mould or warped cabinets. When a fan goes kaput, you’ll often smell it before you see it—think damp, lingering, musty air.
Now, here’s a crucial detail: extractor fans mix electrics and (sometimes) moisture, so safety isn’t optional. If your kitchen has lots of condensation, or the wiring looks dodgy, getting a pro in might be wiser. But if it’s a straight swap—same size, same type, dryer kitchen—most fans just need a screwdriver, a bit of patience, and some basic knowledge of home electrics. Still, it’s worth repeating: don’t mess with wiring if you’re unsure. UK law says major electrical work in kitchens must be signed off by a certified electrician—so, always check the regs in your area.
Think you can handle it? Good. Here’s what you should absolutely double-check before you crack open the toolbox:
- Have you turned off the power at the fuse box? Seriously, don’t just flick the switch on the wall.
- Is your replacement fan the exact same size and type as the old one?
- Can you safely reach the fan, either over your hob or inside a cupboard?
- Does the vent (if applicable) line up with your replacement fan?
- Are you confident you can reconnect wires the right way, using the proper terminal blocks or connectors?
A little planning saves a world of headaches. Most new extractor fans are designed for DIYers, with clear colour-coded wiring and simple mounting. Some even have plug-and-play connectors. Just don’t underestimate cleaning—years of greasy gunk behind an old hood is nobody’s idea of fun.
Tools, Safety, and Preparation: Getting Ready for the Job
The difference between a smooth DIY project and a series of disasters usually comes down to how well you prepare. Replacing a kitchen extractor fan isn’t open-heart surgery, but it still means working near electricity, up on steps or chairs, often with both hands full. Getting hurt or botching the wiring isn’t worth rushing for.
You’ll need some tools from the get-go. Grab a sturdy stepladder that locks open, a crosshead screwdriver (unless your new fan calls for a flathead), and a voltage detector pen or socket tester. If you’ve got an older home, wire strippers and some new terminal blocks come in handy—the plastic on old wires sometimes cracks. If your fan is wired via a fused spur (usually a little box on the wall or above a cupboard), you’ll want to check and possibly replace the fuse while you’re at it.
Before you even unpack the new fan, shut off the kitchen circuit at your consumer unit or fuse box. Use that voltage detector to triple-check the power is truly off. It sounds obvious, but every emergency room has stories about people who trusted a light switch instead of the fuse box. Want to be doubly sure? Turn off the main switch for the whole house, especially if you’ve got little ones darting around.
Extractor fans are usually mounted via screws through the chassis into the wall or cupboard. Make sure your wall plugs are tight—loose ones mean a wobbly fan, which creates new rattles. If you’re replacing a ducted fan, inspect the ductwork for cracks, nests, or leftover debris (it happens more often than you think—one installer in Leeds found a handful of bird feathers and an old playing card stuck inside a vent!). Ducts need a solid, airtight fit to avoid leaks that just dump all the greasy air right back into your walls or ceiling cavity.
If you’re swapping to or from a recirculating fan, pay extra attention to the filters. Carbon filters need switching every few months to keep things fresh, while the grease filter is often aluminium mesh you can pop in the dishwasher—just don’t forget to reinstall it. Marking where your wires connect can save your sanity later: snaps on your phone work great, or use painter’s tape with quick notes.
On safety, don’t skimp on eye protection when working overhead. Unscrewing a fan can release dust, old insulation, or even dead bugs (ask any repair tech; this happens all the time). Have a torch or headlamp handy—most kitchen workspaces are dim in all the wrong places. If you find the wiring’s a confusing tangle, just stop and call an electrician. There’s no shame in recognizing your limits.

Follow These Steps to Replace Your Kitchen Extractor Fan
Once you’ve read the instructions, checked the specs, and killed the power, it’s game on. Here’s a step-by-step approach seasoned DIYers swear by:
- Remove the old fan. With the power off, take off any filters or covers. Unscrew the fan from the wall or cupboard. If it’s siliconed or sealed, gently slice through with a utility knife. Carefully pull the fan forward to expose the wiring—there should be enough slack, but don’t yank.
- Take a photo of the wiring. This is a lifesaver later, especially if you get interrupted. Look for the live (brown or red), neutral (blue or black), and earth (yellow/green) wires. Double-check your replacement fan’s manual, as some fans—especially older UK models—may have different colour codes. Disconnect each wire, usually by loosening the clamping screws or releasing a push-fit terminal.
- Check and clear the vent. If your fan’s connected to ducting, stick your hand or a small vacuum hose inside to make sure nothing’s blocking the airflow. No use installing a new fan if the duct’s clogged with lint or remnants of that kitchen renovation from four years ago.
- Prepare the new fan. Most fans have a removable wiring cover—pop it open and thread your wires through. If you need to swap out screws or add new wall plugs, now’s the time. Hold the new fan in place, checking that it lines up neatly with the vent hole (make sure the flap or backdraft damper, if present, opens and closes smoothly).
- Reconnect the wiring. This is the moment for your wiring photo—not everyone remembers which wire is which after three lunch breaks. Match the colours up exactly, tighten the terminals, and gently tuck in any excess wire. Pop the cover plate on.
- Mount the new fan. Screw it back into place, but don’t overtighten—cheap plastic casings can crack under too much force. If you unscrewed or cut away old sealant, run a new thin bead of kitchen-safe silicone around the fan for an airtight finish. Use kitchen wipes to tidy up the area and snap the filters or covers on.
- Restore power and test. Go back to the fuse box and switch everything on. Hit the fan’s power switch. It should whir into life—no odd smells, rattles, or flickering. Test it on all speed settings, and if your fan has a light or built-in timer, check those too.
If it’s not working or flickering, double-check the connections—or, if you smell burning or the breaker trips, get an electrician involved ASAP.
Professional installer Jason T., quoted in Ideal Home 2024, gives this tip:
“Take your time with wiring. A rushed job nearly always means you’ll be redoing it—especially if a terminal comes loose.”Patience really does pay off here.
Common Pitfalls and Pro Tips to Make It Easy
Even seasoned DIYers slip up, especially in kitchens full of distractions. If you want to get it right first time, here are pitfalls to dodge and pro hacks to make the job easier (and safer):
- Mixing up wiring: Always use that photo as a backup and label wires if you have to step away mid-project.
- Forgetting to check airflow: Install the fan only to realize the duct’s blocked. Always check for airflow with a sheet of paper—it should stick to the vent if things are working right.
- Mounting at the wrong height: If you’re changing models, double-check the minimum distance above your cooktop. Most UK building regs say at least 65cm above gas hobs, 50cm above electric. Mounting too low is a fire hazard.
- Not cleaning behind the old fan: Grease build-up is a fire risk and stinks up the kitchen. Scrub the area before installing the new fan.
- Reusing damaged parts: Old duct tape, loose wall plugs, or cracked wiring aren’t worth risking—replace with new for a secure fit.
Most extractor fan failures in kitchens (according to a 2023 report by HomeServe) are caused by two things: neglecting regular cleaning, or blocking airflow with overfull cabinets or boxed-in ducting. Keeping that route clear is hands-down the easiest way to get a long life from your new fan.
If your DIY confidence wobbles at complex wiring or if your cooker hood model has an integrated fan with lights, remote switches, or other electronics, calling in a pro might save you frustration and future expense. London-based kitchen fitter Mark H. has this to say:
“Thousands try, but the problems come when the fan’s part of a built-in oven hood or the wiring runs through a maze of junction boxes. If you’re feeling out of your depth, don’t push it—getting an extractor wrong can mean leaks, smells, or worse, electrical issues.”His advice? For a straightforward wall-mounted fan, DIY is usually doable; anything more, get a quote first.
Have you ticked off all the above? Go ahead, flex your DIY muscles. Download the instructions, snap those photos, don’t rush, and reward yourself with something less stressful—like a bacon sarnie cooked with your new, whisper-quiet kitchen extractor fan humming away. Air stays fresh, cabinets stay clean, and you’ll have a bit more confidence next time something buzzes, wobbles, or clicks in the kitchen.