That sinking feeling when your electric stove refuses to cooperate—like when you’re itching for a midnight snack or halfway through prepping Sunday roast—it’s more familiar than you’d expect. Of all the sleek appliances in our kitchens, electric stoves cause their fair share of stress. And while these gadgets look robust, they’re actually prone to a couple of incredibly common (sometimes weirdly frustrating) problems. Skip wasting your time arguing with a cold burner or cursing a stubborn control panel. Getting to know the weak spots in your electric stove means less panic and more hot meals.
Your Electric Stove is Not Heating Up
Right, let’s get straight to it—the most common headache: your stove just isn’t heating. It sounds basic, but it’s the number one complaint people have about their electric stove. You twist the knob, expect the sizzle, and get… nothing. Or the burner glows, but you might as well be cooking on a metal plate in the middle of a December night.
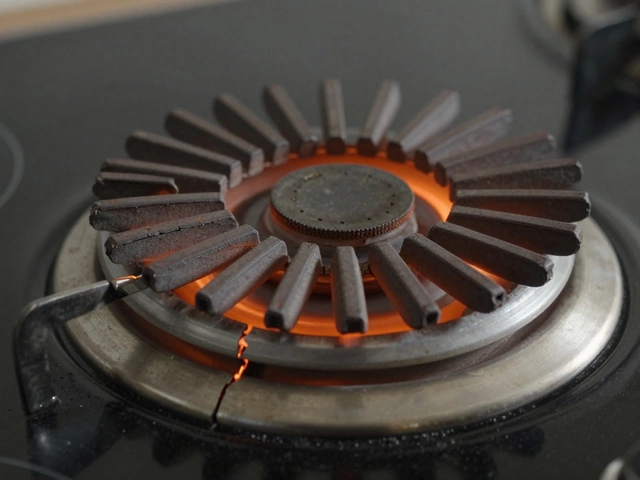
Usually, the problem sits with the heating element. On most models with exposed coils, you can spot obvious cracks or blisters—tiny burn marks are the classic hint. If your hob is glass or ceramic, it’s trickier: sometimes, the element (hidden below the surface) is broken, and you won’t see a thing. A 2023 study by the UK Home Appliance Association found that faulty elements caused over 58% of electric stove failures reported across the country. It’s fair to say, this part is the usual suspect.
But hold on—it may not only be the heater’s fault. The connection where the coil plugs in could be loose or corroded. Over time, even the prongs get grimy. These tiny connectors have to carry a decent amount of power, and you’d be surprised how a faint layer of gunk or rust stops the whole thing from working. Even regular cleaning (or, let’s face it, a stray splash of soup while boiling over) can cause issues. Sometimes, a quick wiggle of the burner or a gentle clean with an old toothbrush can bring a dead stove back to life. Always unplug it first, obviously—no one wants to test their reflexes with a live socket.
What if you’ve checked the coils and plugs but the hob still won’t fire up? Next in the firing line: the infinite switch (that’s the little module under your knob). It’s called ‘infinite’ because you can finely adjust the heat up and down, but all that turning wears the mechanism out. It’s surprisingly common for these switches to burn out—signs include a burner stuck on high or refusing to heat at all. They’re not too expensive to swap, but you’ll want to check your model’s layout before diving in. Loads of repair guides (especially on YouTube these days) show step-by-step how to replace this bit, but again—make sure the power is off. The UK government reckons improper DIY repairs cause about 200 appliance fires a year, often thanks to bare wires being left exposed.
Short on time? Here’s a quick snapshot of what might be the cause and a basic way to confirm the fault:
| Problem | Likely Culprit | Quick Test |
|---|---|---|
| Burner not heating | Faulty element or loose terminal | Swap with another burner of the same size |
| All burners dead | Stove power supply or blown fuse | Check circuit breaker or fuse box |
| Burner stuck on one setting | Broken infinite switch | Try swapping knob to another burner, check for audible clicking |
For anyone interested in getting hands-on, here are some signs and tips worth knowing:
- If one burner doesn’t work but others do, swap the element with a working one. If it works in the other slot, your socket or switch has a problem, not the coil.
- If all burners are cold, it’s worth checking your RCD (that’s the safety switch in UK homes) or circuit breaker—sometimes a stove can trip the breaker without anyone noticing.
- Notice a humming or quiet buzzing sound while turning the knob but no heat? The switch module is probably gone.
Don’t underestimate the importance of a clean connection. Wiping up spills immediately helps prevent corrosion, and a regular vacuum around the base (especially if your stove is freestanding) can stop dust and pet hair from working their way inside the terminal connectors.
And here’s one last tip from local repair techs around Bristol: if your stove is older than 10 years and keeps knocking out elements, start thinking about a replacement. The performance and efficiency of a decade-old unit rarely matches the new ones, which are kitted out with better safety sensors and stronger elements.
Control Problems: Knobs, Switches, and Touchpads
Sooner or later, everyone runs into the ‘why is nothing happening?’ moment. You crank the knob, tap the glass, but it’s like trying to order food from a brick wall. The control systems on an electric stove look sturdy, but they’re kind of a weak point. I’ve seen inexpensive plastic knobs snap right off from a busy family kitchen, and touch-sensitive panels turn into their own kind of puzzle after a tiny spill.
Old-school stoves rely on rotary knobs linked to “infinite” switches. The name sounds fancy, but the mechanism inside really just makes a small electrical arc every time you turn the dial. Years of little sparks eat away at the material, leading to poor contact. Here’s the trick no one tells you: if you notice uneven heating or have to ‘jiggle’ the knob to get a response, the switch is probably failing.
Things get more dodgy when you’re dealing with electronic touch panels. These are great until a bit of water gets underneath or one sensor loses connection. Even a quick steam clean (a common rookie mistake) can send moisture straight into the underlying circuit board and short out the panel. British researchers from Appliance Fix UK noted in 2024 that touchpad faults tripled compared to 2018, as more homes moved away from knobs toward flat surfaces. That glass is easy to wipe but not so forgiving when it comes to trapped moisture.
If you’re dealing with mysterious errors—random beeping, blinking displays, or burners that ignore your commands—try a hard reset. Switch off the appliance at the main power (not just from standby) for five to ten minutes. This can let capacitors discharge and sometimes brings a confused touch controller back to life. Don’t have access to the plug socket? Use the home’s circuit breaker for the kitchen. This trick fixed more than half of error code issues reported to Bristol’s major repair shops last year, according to published service data.
Physical knobs and touch pads each have their telltale warning signs. Here’s a cheat sheet for both:
- Rotary knob feels loose or ‘gritty,’ or doesn’t spin smoothly: likely the infinite switch is on its last legs.
- Knob clicks but nothing happens—internals may have snapped off or worn out.
- Touchpad skips number selections, displays odd symbols, or seems to ‘freeze’: suspect a water-damaged or dirty panel.
- Burner switches on by itself, or won’t turn off: cut the power at the breaker, and don’t use the stove until it’s checked by a pro. That’s often a sign of a stuck relay, which can create a serious fire risk.
Trouble with replacement parts? Some generic knobs are universal, but for touch panels, you’ll need the exact model number of your stove—usually found inside a drawer, or printed around the opening of the oven. Write it down before heading to a local repair shop, as staff will always ask for it.
If you want to keep things ticking, never yank a stuck knob—there’s usually a retaining clip you can gently pop out with a butter knife. As for touchscreens, use a soft, barely damp cloth rather than spraying cleaner. Electric stove problems almost always start small but can lead to total breakdowns if ignored. A bit of TLC once a month saves you from a big bill down the line.

How to Troubleshoot Electric Stove Issues at Home
Most of us dread the idea of poking around a live appliance, but there’s plenty you can do before calling a pro. Stoves aren’t complicated, despite their high-tech looks. You’re dealing with three or four main systems: heating elements, switches or controls, wiring, and a power supply. Nine times out of ten, the fix starts with a quick elimination process. Here’s a home-friendly checklist to pin down what’s wrong:
- Start by turning off the appliance at the plug or breaker before doing anything hands-on. Safety matters. Shocks from mains voltage hurt.
- Check if the display panel or indicator lights are on. If not, double-check your circuit breaker or fuse box—if the fuse has blown, nothing will power up.
- Test all burners (or zones on a ceramic hob) with a known working pan. Not heating? Move the pan around the ring. Sensors sometimes fail to detect lightweight or warped pots, especially on induction hobs.
- Swap any dead coil or element with one from another spot. If the second location works, your element is fine, and your socket or switch is the trouble.
- If your stove uses digital buttons or a touchscreen and it’s stuck, pull the plug (or flip the circuit breaker), wait a few minutes, and power it back on. This resets a glitchy chip in a surprising number of cases.
- Listen for strange noises—buzzes, clicks, or faint pops when turning controls can signal worn switches or loose wiring.
- Check the state of the plug and socket on freestanding models. Blackened or melted plastic is a warning sign; unplug it and call a technician. Loose plugs can also make intermittent contact, causing random shut-offs.
- On glass hobs, use a torch to check for hairline cracks. If you spot one, stop using the cooker and arrange a replacement plate. Cracks can lead to hidden short circuits inside the element chamber.
Still stuck? Document what happens—write down which burners failed, what the indicators say, and which symptoms appear after resets. Repair engineers love details; the more you share, the quicker they’ll have it sorted. Photos help, too, especially if you’re emailing a repair shop for parts or advice. And if you’re living in rented accommodation, drop your landlord a message as soon as you spot trouble—under UK tenancy law, persistent faults with kitchen appliances are their responsibility. Never risk a repair that feels above your confidence level; kitchen fires from botched fixes aren’t worth the risk.
When to Call a Professional Repair Service
Sure, plenty of stove woes are DIY-friendly, but sometimes you’re better off calling in the cavalry. How do you know when you’ve hit that point? Look for any of these signs:
- Visible sparking, burning smell, or scorch marks—stop, unplug, and reach for the phone. These are all signs of potentially dangerous faults inside the wiring or heating assembly.
- Burners heat sporadically, or only work at maximum or minimum. This usually points to a total failure of the control switch or, on digital stoves, a busted logic board.
- Repeated tripping of your home’s RCD (residual current device) when the stove is switched on. This could mean a wiring short or a damaged internal relay that requires professional tools to trace.
- Stubborn error codes or unresponsive touch panels after a reset. Most digital models store their own diagnostic logs, but decoding these often needs specialist gear and software.
- Cracks or chips in glass-ceramic stove tops. Fact: once the integrity of the glass is compromised, it’s easier and usually cheaper to replace the whole hob unit than attempt a risky repair.
On top of that, any hesitation about poking around electrics means you’re better off bringing in someone who does this for a living. Don’t worry about wasting their time—Bristol’s appliance engineers typically fix standard electric stove faults in under an hour if they’ve got the right parts. Costs average between £60 and £110 for basics like burner swaps, and as high as £200+ if a control board needs replacing. You can always ask for a quote first.
If you’re under manufacturer warranty, don’t open the unit. Tampering almost always voids warranties, and most brands send technicians within 24–48 hours for cooker issues, especially if you mention fire hazards or total power loss in your call.
Prevention Tips So You Don’t Face These Problems Often
They say prevention is better than, well, burnt dinner. Electric stoves last longer if you treat them right. Even with regular use, a few simple habits go a long way toward dodging the main problems we’ve talked about. Here’s how you can cut down on annoying breakdowns:
- Wipe up spills as soon as possible. Tomato sauce, syrup, and watery overflows all creep into sockets and connectors, causing long-term corrosion.
- Don’t shove hefty pots onto burners—lift them straight up and down. The weight can bend delicate components under glass hobs or break alignment on old-school coil models.
- Give the knobs a regular clean, but never soak them. Pull them off gently and wipe with a damp cloth. Water and electronics are not mates.
- Put away cleaning sprays: for glass hobs, use a manufacturer-recommended cleaner, and dry thoroughly with a soft towel. This stops streaks and sneaky moisture from building up near sensors.
- Every six months (or more if you have pets), vacuum behind and under the stove. Dust, crumbs, and animal fluff are fire hazards and clog up ventilation around internal components.
- Have an electrician check your sockets and supply to the cooker once every three to five years—especially vital in older British homes, where kitchen wiring gets overlooked.
If your stove’s a decade old, it’s worth budgeting for a new one over the next year or two. Newer models hit temperature faster, run more efficiently, and offer better safety cutoffs. And for those who rent, remember: never try to repair built-in appliances without clearing it with your landlord or letting agency—legally, they’re in charge of fixed kitchen gear.
Spotting problems early makes all the difference. A random cold burner or an occasional beeping error might feel annoying, but catching it early (before it takes out your whole meal plan) keeps stress and repair costs down. Take half an hour every once in a while to learn your stove’s quirks and it’ll serve up hot meals for years with less hassle.