An oven is a kitchen staple that many of us rely on for daily meals and special dishes. But when it stops doing its job because of a faulty heating element, the stress of a repair can weigh heavily. So, knowing what it might cost to replace it and how the process unfolds is pretty handy.
You might notice undercooked meals, a cold top, or cooking times taking longer than expected. These could all be signs that the main component responsible for generating heat has given up the ghost. Whether you're fixing it yourself or calling in a pro, understanding the expenses and steps involved can save you both time and money.
- Signs of a Faulty Heating Element
- Cost Breakdown of Parts and Labor
- DIY Replacement Steps
- Hiring a Professional
Signs of a Faulty Heating Element
Understanding the signs of a faulty heating element in your electric oven is crucial for timely repair or replacement. The first indication often manifests as uneven cooking. You might notice that one side of your dish is piping hot while the other remains tepid, signaling that the element is not distributing heat evenly as it should. This phenomenon occurs because a damaged heating element fails to reach or maintain the proper temperature, leading to inconsistencies in cooking performance. As we rely heavily on these appliances for a variety of tasks, such discrepancies can quickly become a source of frustration.
If your oven is taking noticeably longer to heat up or seems to struggle to reach certain temperatures, this could be another telltale sign of trouble. The heating element is responsible for generating the initial temperature rise, and any lag in this process could suggest deterioration. Regularly checking the preheating time can help catch such issues early. An appliance that once preheated in ten minutes taking fifteen or more not only affects meal preparations but may also be consuming more energy without delivering adequate results.
Visible damage is a more direct sign. A broken or blistered heating element is often easy to identify. If you can safely inspect your oven, look for any cracks, blistering, or discoloration on the element itself. These physical manifestations are clear indicators that the element has reached the end of its lifespan and requires replacement. Moreover, a peculiar smell—almost like a burning odor—might emerge if food particles or grease are being burnt by a failing element, an issue that should be investigated promptly.
Another subtle yet indicative sign is an unusual noise such as a buzzing or popping sound when the oven is in use. While quick to dismiss as another appliance quirk, these noises can stem from electrical issues in the element. Continuous operation under such conditions could pose a safety risk or further damage the appliance. Consulting a professional for an assessment might be wise if these symptoms persist.
"It's essential to diagnose oven issues early to avoid more significant problems," advises Mark Plum, a veteran appliance technician.
Lastly, modern ovens with introspective technology might offer diagnostic cues. Many newer models have error codes that display when there's a malfunctioning component, including the heating element. Cross-referencing this code with the oven's manual can confirm your suspicions if this feature is available. Not only does this save time, but it also provides clarity on how best to proceed, whether by contacting a service professional or attempting a DIY fix. Recognizing early signs of heating element failure can keep your kitchen running smoothly and prevent larger repair bills down the line.

Cost Breakdown of Parts and Labor
Replacing the heating element in an electric oven often breaks down into two major expenses: the part itself and the labor to install it. The heating element is typically a metal coil, and its price can vary depending on the make and model of your oven. On average, these parts can range from $20 to $100. This variance often hinges on whether the component is brand-specific or universal, and whether it’s sourced directly from the manufacturer or from a third-party supplier. Sometimes, specialty ovens or high-end models will require a higher priced part, an important factor to consider when budgeting for a repair.
The labor cost can be more significant. Hiring a professional technician to do the job can add between $100 and $300 to your bill, primarily due to the expertise and careful handling required. Keep in mind, the geographic location and the complexity of the repair needed can also influence the labor costs. For instance, a job requiring the technician to dismantle the entire stove will likely cost more than a straightforward replacement. Labor charges also factor in travel time, diagnostic tests, and sometimes a service fee, so it’s wise to ask for a detailed quote upfront.
"It's not just about replacing a part, but ensuring the appliance is safe and functions efficiently," remarks John Stevens, a certified appliance repair technician with over 20 years of hands-on experience in the field.
For those interested in a DIY approach, you could potentially save on labor costs, but this method requires a fair amount of skill and some specialized tools. If you're comfortable around electrical components and have taken on similar projects before, the challenge could be worthwhile. Otherwise, hiring a professional not only ensures the job is done correctly but can also grant peace of mind regarding safety and accuracy. As per some studies, a well-executed repair by a professional can extend the lifespan of your oven by several years, making the initial outlay worthwhile in the long run.
Here’s a quick overview of the cost structure:
| Item | Average Cost |
|---|---|
| Heating Element | $20 - $100 |
| Labor | $100 - $300 |
| Total | $120 - $400 |
This breakdown might help you decide whether to tackle a repair yourself or call in a professional. It's often the case that the complexity and potential risks of electrical repairs might not be worth the relatively small savings. Always weigh these options carefully.

DIY Replacement Steps
When your trusty oven decides to stop heating as it should, it might just be the heating element that needs some TLC. Tackling the replacement yourself can not only save you some cash but also give you a sense of achievement. Now, let’s dive into the nitty-gritty of carrying out this oven repair without breaking a sweat.
The first step to take is safety. Always disconnect any appliance before you start fiddling around with its guts. Electrocution is real folks, and no one needs that experience. Once your oven is as dead as a doorknob, it’s time to locate the heating element. For most electric ovens, this can be found at the back of the oven cavity or underneath the bottom panel. Gently unscrew the panel or any covering to reveal the worn-out element, like peeling back the layers of a mystery.
Gathering Your Tools and Parts
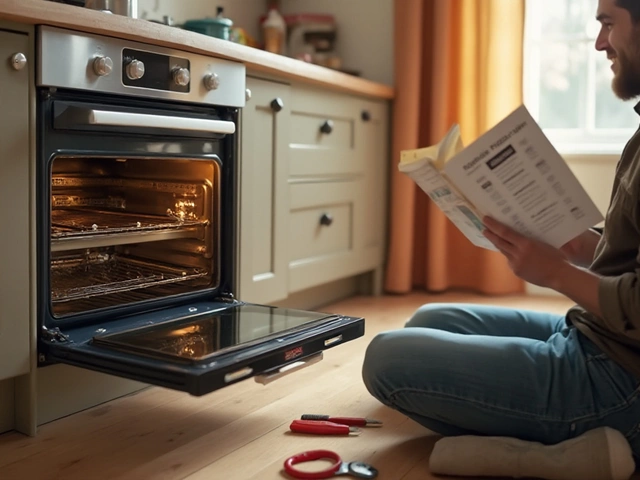
Before unscrewing or unplugging anything, make sure you’re armed with the right tools. A screwdriver set, preferably magnetic since those screws can be sneaky, pliers, and of course, the correct replacement heating element should be on your list. When buying this part, you’ll need the oven’s model number. It’s usually found on a sticker around the door frame or sometimes on the unit itself.
Get your workspace ready – you want clear lighting and space to lay out the components. It's like setting the stage for a small operation, except your 'patient' is an inanimate object. If you like, you can snap a few photos of how everything looks before disassembly, just in case you need a reference point during reassembly.
Removing the Old Element
Here comes the more hands-on section. Remove all screws or clips holding the element in place with your trusty screwdriver. Most ovens use standard Phillips or flathead screws, but occasionally a specialty screw could pop up. As you remove the old heating element, make sure to note how it’s connected, since the new one will need to fit exactly the same.
Pull the element out slowly, taking care to gently unplug any wiring connected to it. These wires can be quite stubborn, so using a pair of pliers to ease them out might be necessary. Just remember—gentle does it, you don’t want to break anything while you remove parts.
Installing the New Element
With the old element gone, you’re halfway home. Grab the shiny new part, and it’s time to fit it into place. Connect the wires to the same terminals as the old element. Ensure they’re snugly seated; loose connections can lead to inefficient heating or worse, a non-working oven again. Align the element in its rightful spot, then secure it with screws.
Here's an interesting tidbit from the folks at the Consumer Reports,
"Replacing the heating element yourself can save an average of 30% compared to hiring a professional, with most parts costing between $30 and $100."With everything screwed back in place, it's a good idea to double-check connections. Make sure nothing is left dangling or unscrewed.
Testing Your Oven
With everything back in place and looking pristine, it's time to reconnect your oven to the power supply. Flick the switch, and let’s see if all that effort paid off. Let it heat up; set it to a moderate temperature, and make sure it reaches it without a hitch. This step verifies your installation was successful and ensures dinner can be on the table tonight without worry.
Tackling an electric oven repair like this may seem daunting at first, but with the right approach, it’s pretty straightforward. Just a few steps and you've breathed new life into your kitchen. Plus, knowing that you did it yourself adds a nice little feather to your cap.

Hiring a Professional
When it comes to replacing a heating element in your electric oven, opting for professional help can be a wise choice, especially if you're not confident with handling electrical components. An expert brings not just skills but also the assurance of a job well done safely. By hiring someone with experience, the risk of potentially damaging parts of your oven further is minimized, and you get peace of mind that the new element will operate as it should.
The cost of hiring a technician generally includes both labor and the replacement part itself. According to industry estimates, the labor cost can range from $50 to $100, in addition to the price of the heating element, which might be anywhere between $20 to $80 depending on your oven model. An experienced professional usually provides a quote that lumps these costs together, offering transparency and avoiding unexpected expenses. It's always a good idea to verify if the quoted price includes a warranty for the labor or parts, as this can protect you if any issues arise post-repair.
According to Consumer Reports, “Many appliance repairs can be simple but relying on the right expert ensures safety and efficiency, extending the life of your appliances.”
Finding the right professional involves a bit of research. Look for certified technicians who specialize in household appliances, as they are more likely to have specific knowledge about oven repair. Checking online reviews and asking for recommendations from friends or family can help vet potential candidates. Additionally, many professionals are part of larger service networks or companies that might offer booking and customer reviews through their platforms, making it easier to compare options.
An often overlooked advantage of hiring an expert is the diagnostic benefit they provide. An experienced technician doesn't just solve the problem at hand—they can also offer advice on preventing future issues, ensuring your oven functions efficiently for a longer period. Many times, what seems like a simple heating element replacement could be indicative of underlying issues, such as electrical problems or faulty wiring, which a trained professional could identify and rectify before they escalate.
Before finalizing a technician, discuss the repair extensively. Clear communication about the symptoms your oven is displaying and any past repairs you've had will allow the technician to better prepare for the visit. With clarity and understanding from both parties, the repair process can be seamless and efficient, ensuring you return to hassle-free cooking in no time.


