So, your shower's running cold, and your first thought might be a broken water heater. Before you panic, it could just be a bad element. Water heaters usually have two – one at the top and another at the bottom – and it's not uncommon for one to go out before the other. But how can you tell? Let's get into some no-nonsense ways to pinpoint the issue.
First off, listen closely. Is your heater making strange noises like clinking or popping when it's on? These could be signs of sediment build-up around the element, which often happens over time. Less noise but no heat? That might suggest the element's simply had enough and quit on you.
Recognizing the Signs
When your water heater starts acting up, it's essential to notice the telltale signs early. This can save you from icy showers and, more importantly, from larger repair bills down the road.
Temperature Troubles
If you find your water isn't as hot as it used to be or fluctuates between hot and cold, one of the heater elements might be on the fritz. Often, it begins with the water taking longer to heat up. Eventually, you might only get lukewarm water at best.
Hearing Unusual Sounds
Can you hear odd noises like hissing, popping, or sizzling from your heater? Those sounds might be caused by sediment build-up around the element, affecting its performance. It's like the element's shouting for help!
"Regular maintenance of water heaters can prevent sediment build-up and extend the lifespan of heater elements." - The Energy Savings Handbook
Discolored Water
Rusty or cloudy water is another sign that something's off. While this might point to corroded pipes, it can also indicate a deteriorating element. Especially in electric water heaters, a faulty element can cause discoloration as it degrades.
Checking with a Simple Test
You might want to do a visual check. Note the wiring and connections. Loose or burned connections point toward big problems. Instead of trying this alone if you're not confident, consider checking the resistance with a multi-tester.
Below is a list of common signs that might indicate an element issue:
- Inconsistent water temperature
- No hot water
- Unusual noises
- Discolored or rusty water
- Visible damage or corrosion on the element
Being aware of these signs can help you tackle the water heater repair more effectively, whether you're a DIY enthusiast or know when to call in the pros.
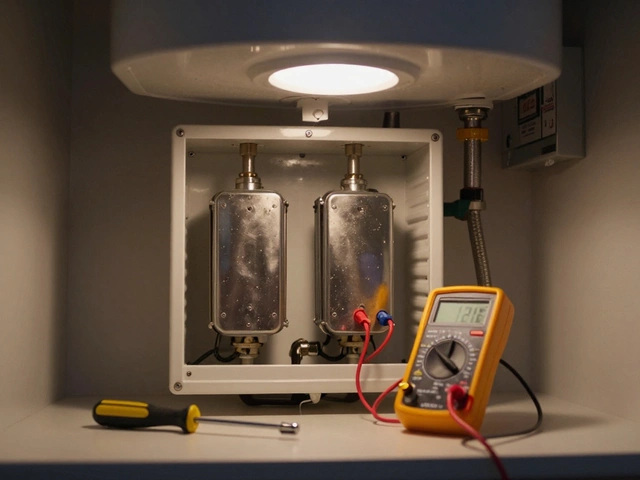
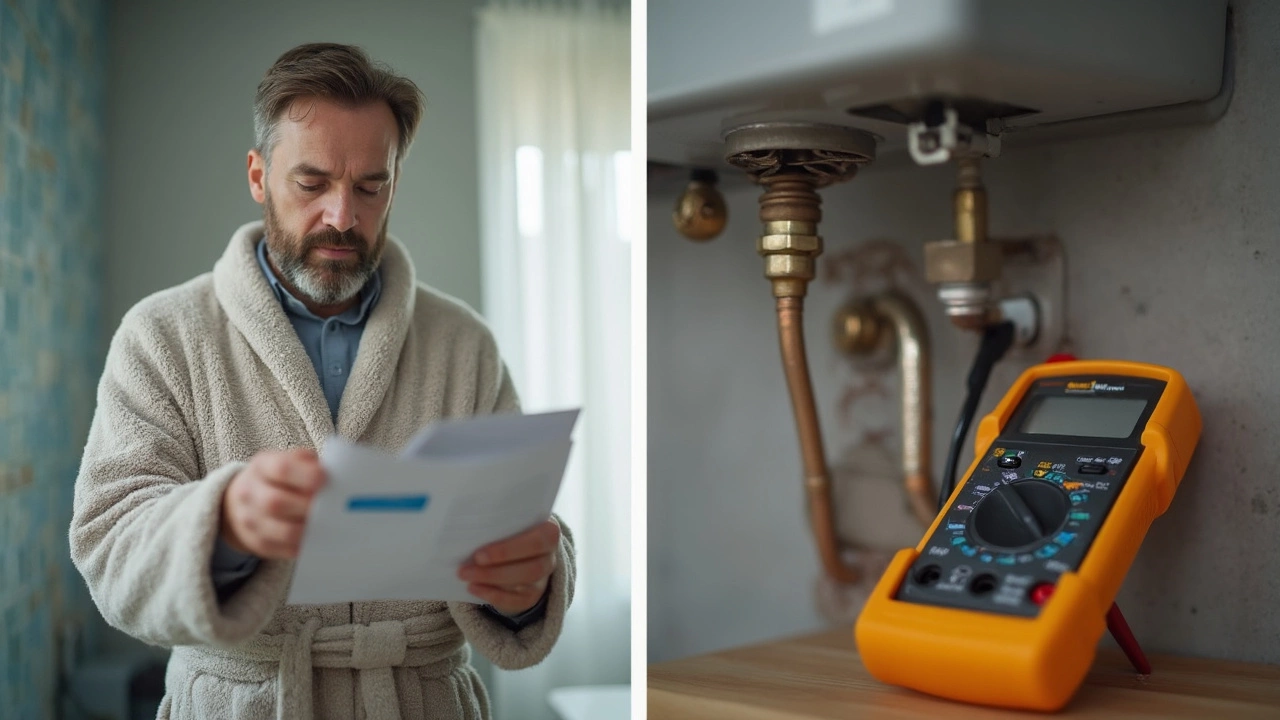
Testing the Element
Before you dive into testing, safety comes first. Make sure to turn off the power to your water heater at the breaker box. This is crucial to avoid any nasty shocks. Once that's done, let’s get into the nitty-gritty of testing.
Gathering Your Tools
You’ll need a few items: a screwdriver, a multimeter, and a bit of patience. The multimeter is vital for checking the heater element for continuity, which basically tells you if it's still working.
Step-by-Step Guide
- After ensuring the power is off, remove the access panel on the side of the heater to reach the element. You might need to unscrew a few things to get there.
- Adjust your multimeter to the ohms setting. A reading of zero ohms means your element is shot. Anything else, and it might still be good.
- Next, place one multimeter probe on a screw terminal of the heater element, and the other on the other terminal. Look at the display. A working element roughly shows 10-16 ohms.
- Test for shorts too. Place one probe on an element terminal and the other on the metal surface of the heater. A reading here indicates a short, meaning the element should be replaced.
With these steps, you'll know if the problem lies with the element. If readings seem confusing, double-checking often clears things up.
What the Numbers Mean
A typical healthy element will show consistent resistance. Too high or low suggests issues. It's a simple way to figure out if your heater element is causing those cold showers.
| Resistance (Ohms) | Status |
|---|---|
| 0 | Element is bad |
| 10-16 | Element is good |
| Infinity | Element is broken or has an open circuit |
Tools You Need
Now, before you roll up your sleeves and get started on diagnosing or fixing your water heater, make sure you have the right tools in your arsenal. It's all about working smart, not hard.
Essential Tools and Equipment
- Multimeter: This is your best friend when testing if the current is flowing properly through the heater element. It's a must-have to check for continuity.
- Screwdriver Set: Most heaters require you to remove a panel to access the elements. A Phillips or flat-head screwdriver will usually do the trick.
- Element Wrench: Specific to water heater elements, this wrench helps you safely loosen and remove the element, or snug it back up after a fix.
- Wire Strippers: In case you have to deal with the wiring, these make easy work of exposing wire ends.
- Safety Gear: Don’t skip on safety goggles and work gloves. Handling electricity and water can be risky without these.
Why These Tools Matter
Each of these tools has its own job in making sure you aren't flying blind. The multimeter tells you if your element is conducting electricity. If it's not, you know it's time for a replacement. A pair of wire strippers lets you prep any necessary wire ends, and the screwdriver and wrench are your go-tos for getting the element out and in place.
Without these tools, you'd be hard-pressed trying to solve the mystery of a nonfunctional water heater. But with them, you'll feel like a pro – and avoid the dreaded icy showers in the morning!
Repair or Replace
So, you've narrowed it down to a faulty water heater element. Now comes the big question: should you repair it, or is it time for a replacement? Let's break it down so you can make an informed decision.
When to Repair
If your heater element is fairly new, or you've diagnosed a simple issue, repairing might be the best route. A typical heating element isn't too expensive, usually ranging from $10 to $30. With a bit of DIY spirit, replacing this part can save you some bucks.
Here's a quick rundown of what a repair involves:
- Turn off the power. This is non-negotiable. Find your breaker box and shut it down.
- Drain the tank. Connect a hose to the drain valve, direct it to a safe draining spot, and open the valve.
- Remove the faulty element. Use a simple wrench to unscrew it after detaching any wires connected to it.
- Install the new element. Secure it in place and reattach the wires.
- Refill and test. Close the drain valve, refill the tank, and turn the power back on to test for leaks and proper heating.
When to Replace
Sometimes a repair just won't cut it. If your water heater is over 10-12 years old, or if it's exhibiting multiple issues like leaks or inconsistent temperatures, it might be due for a full replacement. This ensures you don’t have to keep dealing with small repairs that can add up over time.
Aside from age, here are a few signs it's time to replace:
- Rusted water. This could be a sign of tank deterioration, not just the element.
- Frequent breakdowns. If repairs become a recurring event, it's a red flag.
- Escalating energy bills. An inefficient unit can hike up your costs.
In some cases, investing in a new, more energy-efficient model can actually save you money in the long run. Newer models often come with better energy ratings and faster recovery rates.
Cost Considerations
A replacement water heater can cost anywhere from $300 to $1,500, depending on the type and size. It’s a bigger upfront cost but can pay off through energy savings and fewer headaches.
| Type | Average Cost |
|---|---|
| Standard Tank | $300 - $600 |
| Tankless | $500 - $1,500 |
Weigh your options carefully, and don’t hesitate to consult with a professional if you're unsure. Knowing when to repair or replace can mean the difference between a quick fix and a long-term solution for your hot water needs.