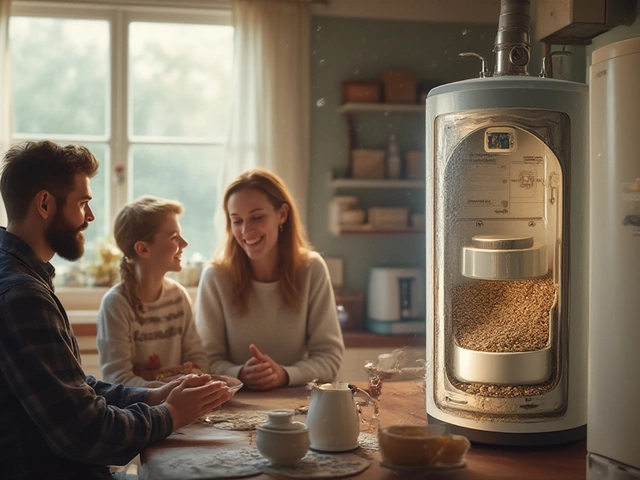
Facing a cold shower when you're expecting hot water can be a chilly surprise, yet it's a common problem that numerous homeowners encounter. While the issue can stem from various causes, there are several steps you can take to identify and potentially fix the problem yourself before calling in the professionals.
Whether you’re a seasoned DIY enthusiast or just trying to avoid an ice-cold shower, understanding your water heating system's nuances is essential. Read on to explore some of the most common reasons your shower might be running cold and what you can do to bring back that comforting warmth.
- Check the Water Heater Settings
- Inspect the Thermostat
- Assess the Heating Elements
- Examine the Shower Fixtures
- Investigate Sediment Buildup
- When to Call a Professional
Check the Water Heater Settings
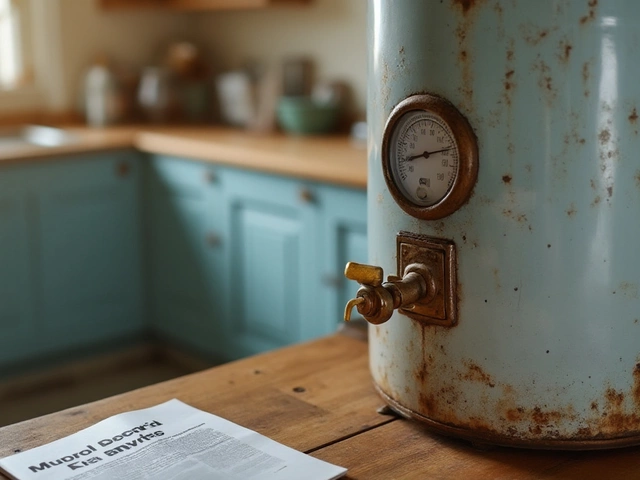
When you find yourself welcomed by a chilly shower, the first thing to investigate is the water heater settings. It's not uncommon for these settings to be inadvertently adjusted, especially if you share the space with others or during activities like cleaning. The water heater thermostat is typically set between 120°F and 140°F, a range that provides both safety and comfort. Setting the thermostat above 140°F not only risks scalding but escalates energy costs without noticeable benefit. As you inspect the thermostat, it's crucial to ensure it's firmly in place—not rattled by vibration or an accidental bump. In many cases, simply adjusting this setting can restore your hot water, saving you a service call. Remember also to take a look at any digital displays or indicator lights that might provide error codes valuable for diagnosing issues without professional help.
If your water heater came with a manual, now's a good time to dig it out. Many modern units have specific instructions to reset the thermostat or run diagnostics. Often, newer water heaters include an eco-mode, which could be set too low to adequately heat your water. "A well-set thermostat isn't just about immediate comfort," explains John DiPietro from the Water Quality Association,
"It's a balance between safety, efficiency, and sustainability."Adjusting settings without this context could disrupt that balance, leading to recurring issues or unnecessary energy consumption.
For those with electric water heaters, don't overlook the dual-thermostat setup common in these models. Both the upper and lower thermostats should be checked and adjusted if necessary. The upper thermostat primarily controls the water temperature, while the lower thermostat maintains it through cyclical heating. Again, ensuring that both thermostats are synchronized is critical. A mismatch can lead to uneven heating, which might explain why you get sporadic hot water. You can use a multimeter to check whether these components are functioning correctly; doing so might indicate the need for replacement if they're for some reason malfunctional.
Homeowners with no hot water issues might also have their gas valves to blame, especially in gas-powered units. This valve should be in the 'on' position, sealing off another potential source of the problem. A slight tweak to the valve could be all it takes to go from chilly mornings to a reinvigorated hot shower experience.
Remember, when adjusting these settings, safety is paramount. Exercise caution, and if at any point you feel uncertain, reaching out to a professional for advice or service is a wise course of action. No amount of DIY resolve should compromise the safety of your home and its occupants.
Inspect the Thermostat
When your shower isn't delivering the desired hot water, inspecting the thermostat on your water heater is a crucial step that often gets overlooked. The thermostat is the device that controls the temperature of the water. It monitors and maintains this setting by signaling the heating element to activate. This section will detail how to check and adjust this component, as its misuse can often lead to an unexpected chill in your shower.
Begin by turning off the power to your water heater, especially if your unit is electric, just for safety's sake. Home accidents related to electricity can be dangerous, so this is an essential precaution. Once that's done, you can remove the thermostat's access panel. This usually requires a screwdriver to take off the cover. You'll find the thermostat behind it, often accompanied by some insulation on modern models.
After unveiling the thermostat, examine it for any visible signs of damage or corrosion. If all seems well, check the current temperature setting. Most water heaters are preset to a standard of 120 degrees Fahrenheit, a sweet spot that ensures water is sufficiently hot yet not dangerously so. If the temperature is set too low, you may not experience any hot water. Adjusting the setting to your personal preference can sometimes be all it takes to solve the problem. The graduated dials usually make this straightforward enough.
"According to the U.S. Department of Energy, reducing your water heater's thermostat setting to 120 degrees rather than 140 degrees can bring about considerable energy savings, with the added benefit of preventing scalding."
If you're making adjustments yet don't notice an improvement in the water temperature, there might be an issue with the thermostat itself. Faulty thermostats are known to affect the water heater by failing to communicate correctly with the heating element. In such a case, it's worth testing the thermostat with a multimeter, a handy tool for measuring electrical resistance and consistency.
Testing the Thermostat
To conduct this test, ensure the power remains off to avoid any unpleasant surprises. Set the multimeter to resistance x1, and place the ends of the meter's prongs on the corresponding thermostat terminals. If the reading shows no resistance, you're looking at a malfunctioning thermostat, likely requiring replacement. If so, check your water heater's manual for the correct part or consult with a professional for DIY advice. Remember, the heart of a successful repair lies in accurately diagnosing the problem before diving into full replacements or alterations.
Whether it's tapping into savings or ensuring safety, understanding and properly setting your thermostat can not only resolve current issues but also improve your home's overall energy efficiency. Keeping a regular maintenance check can assist in maintaining an ideal balance of hot water readiness without unnecessary energy burdens.

Assess the Heating Elements
Your water heater's efficiency largely depends on its heating elements, particularly in electric water heaters. If you've noticed no hot water in your shower, the heating elements might be the culprits. These elements are crucial because they are responsible for heating the water as it cycles through your tank. A malfunction here can lead to tepid or cold water, potentially ruining your morning routine. It’s worth noting that heating elements are prone to wear and tear over time, often due to sediment buildup or just regular usage. So, how do you dive into assessing them?
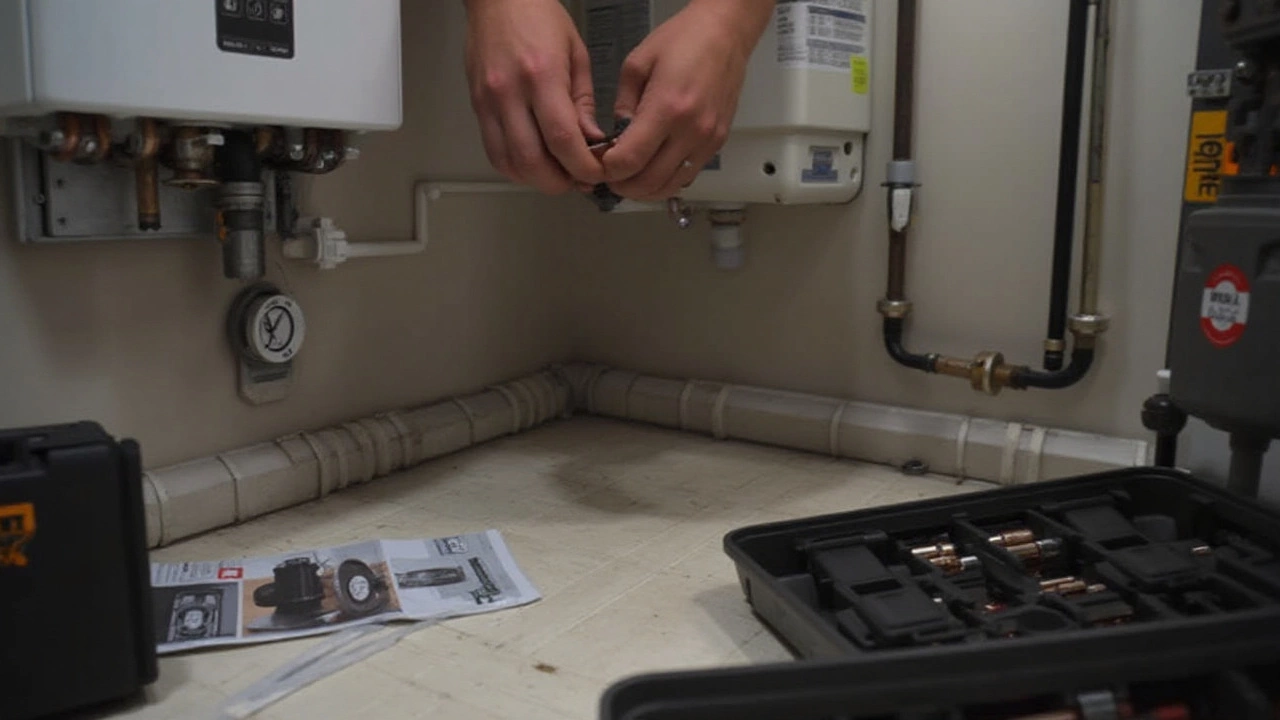
Firstly, you’ll want to ensure that power is reaching your water heater. Find your home's breaker panel, locate the switch for your water heater, and make sure it hasn’t flipped. Once you've confirmed this, the next step is to test the elements themselves. This requires a multimeter, a handy tool that measures electrical values like voltage and resistance. Always make sure to turn off the power to your water heater before testing to prevent any electrical mishaps. For safety, wait until the water heater has completely cooled down to avoid any burns from hot water.
To carry out the test, you'll need to remove the cover plates on your water heater and locate the heating elements. These are usually placed behind the access panels on the side of the heater. Once you've uncovered them, use your multimeter to check for continuity. This simply means checking whether electricity can pass through the element. Surprisingly, many issues arise from burned-out elements, and a continuity test can reveal if an element needs replacing. If the multimeter doesn’t register a reading, it signals that the element is faulty. Consider replacing it with a new, compatible part.
Replacing a heating element may sound daunting, but it’s a task that, with a bit of patience, many homeowners can tackle themselves. Begin by draining the tank – you wouldn’t want to end up with a small indoor flood. Next, unscrew the faulty element using a spanner wrench designed for this purpose, and then carefully insert the replacement. Don’t forget to reinstall all panels securely before turning the power back on.
"Understanding the functionality of your water heater is a skill that pays off," says Dr. Jan Ellis, a notable figure in residential plumbing systems. "Regular maintenance and keen observation can preempt bigger issues."
If you find that replacing the element doesn’t solve the problem, you might be dealing with a deeper wiring issue or a faulty thermostat. For such complex cases, it’s best to reach out to a professional. This brings us back to the significance of ensuring that the problem truly lies with the heating element. Sometimes, the thermostat might need calibration or adjustment. So, giving your water heater a thorough visual inspection might illuminate more about your appliance's condition.
The water heater repair journey can feel like venturing into unknown territory. However, by taking these methodical steps, you not only learn more about what keeps your showers warm but also when it might be time to pick up the phone for expert help. Remember, regular checks and mindful maintenance can forestall more significant issues, preserving your comfort and prolonging your heater’s lifespan.
Examine the Shower Fixtures
When the hot water seems to have taken an indefinite vacation, it’s crucial to consider the possibility of an issue with your shower fixtures themselves. Often, the solution might be as straightforward as addressing a minor blockage or misalignment. The various components within your shower head and tap system can experience wear and tear over time, leading to inefficient performance which might be misinterpreted as a water heater repair need.
Begin by checking your shower head for any possible clogs. Over time, mineral deposits commonly called limescale can accumulate, especially if you live in an area with hard water. This buildup can restrict water flow and affect the temperature mix. To combat this, remove the shower head and soak it in a vinegar solution for several hours, a method which naturally dissolves deposits. Make sure to rinse thoroughly before re-installing. This simple step might just restore your hot water flow, ensuring that clogged nozzles aren’t becoming a hindrance.
If cleaning the head doesn’t resolve the issue, the problem might reside with the mixing valve—an often-overlooked component. The mixing valve regulates the balance of hot and cold water and might need recalibration if it's not set correctly. Adjusting this requires removing the handle of the shower controls carefully and locating the valve. If comfortable, adjust this valve slowly to ensure the shower issues are adequately addressed. Keep in mind that sometimes, the valve might be faulty and require replacement. But before doing so, a simple adjustment can often solve the dilemma.
Replacing components like the valve or washers might seem daunting but is often well within reach of a dedicated DIYer. Ensure you have a proper guide or manual before attempting repairs, which can often be found online or from the manufacturer. However, take note: as fixable as they are, dealing with intricate plumbing systems requires patience and care to avoid causing further plumbing tips scenarios. There's a sage piece of advice which reads,
“A little maintenance goes a long way in conserving the life of home plumbing,”that serves as a reminder of the importance of regular checks.
Finally, ensure that no external factors are altering your shower’s temperature. For instance, simultaneous water usage elsewhere in the home can affect the shower's hot water delivery. If this is the case, it might be worthwhile scheduling your showers at less busy times or adjusting appliance settings to prevent conflicts. It's all about understanding how water flows in your home, offering a stable remedy to your no hot water woes without undue stress.
Investigate Sediment Buildup
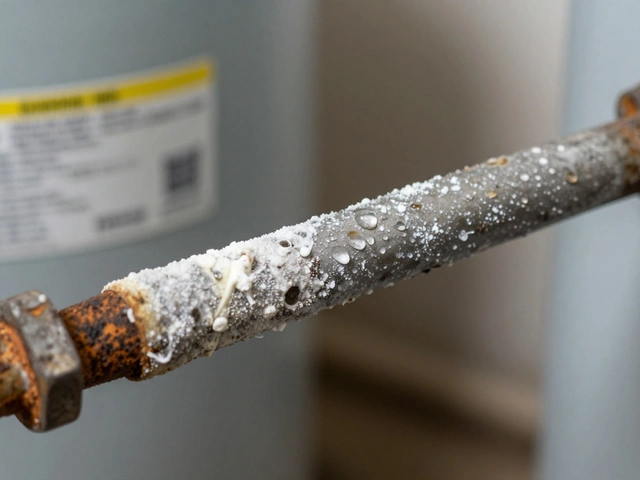
Many homeowners may not realize it, but sediment buildup in the water heater is a frequent culprit leading to no hot water issues in a shower. Over time, minerals and tiny particles present in water, such as calcium and magnesium, settle at the bottom of your water heater’s tank. This accumulation can significantly affect the heater's efficiency, as it acts like a barrier between the heat source and the water it's supposed to warm up. Not only does this reduce hot water availability, but it can also cause your water heater to overwork, leading to higher energy bills and potential damage to the unit.
Recognizing sediment buildup isn't very difficult if you know the signs. If you hear rumbling or popping noises coming from your water heater, it might be crying out for help due to sediment clinking around as the heating elements try to do their job. Moreover, if it seems like a long time is needed for water to heat, or if there’s water that’s just lukewarm at best, sediment is likely an issue. An article from the Environmental Protection Agency warns about hard water issues stating,
"Water heaters take on additional energy usage for every layer of sediment accrued."This statement tends to underscore the importance of routine maintenance.
Clearing sediment buildup isn't just about a stronger flow of hot water; it's about extending the life of your water heater. A simple DIY approach involves flushing the tank. Begin by turning off the power supply to the water heater—be it electricity or gas—and let the tank cool somewhat to ensure safety. Connect a standard garden hose to the tank's drain valve and direct the water to a safe drainage location, typically somewhere outdoors where the hot water can drain safely. Once connected, you can open the valve and let the tank empty, carrying sediment out with the water. It's often recommended to let it run until the water stream is clear of particles. Remember, safety is paramount, so it’s crucial to keep a safe distance from the hot water flow.
It's also worth considering that the water type in your region might contribute significantly to the frequency of such buildups. Areas with 'hard water' often see a faster buildup of minerals within heating appliances. According to recent studies, approximately 85% of homes in the United States have hard water. Maintaining your appliance by routinely checking and cleaning it can curb energy use by up to 15% over time. Investing some time every few months might also prolong the heater's lifespan by several years. If seeing to these tasks feels daunting, never hesitate to call in a professional plumber to handle the maintenance.
Sediment buildup might appear as a minor annoyance, but left unchecked, it could lead to severe failures in your heating system. With some effort and attention, you can ensure your water heater runs smoothly, providing you with comforting, warm showers all year round. Consider it an essential chore, much like changing the air filter in your HVAC system; it keeps everything running at optimal performance. Don’t forget to mark your calendar for regular check-ins, making it a routine part of household maintenance.
When to Call a Professional
Even the most adept DIY enthusiasts reach their limits, and knowing when it's time to call a professional can save you both time and potentially costly damage. Your home's water heater repair requires a deep understanding of plumbing systems, and in many cases, issues might go beyond the visible or what one can easily fix with a standard toolkit. Recognizing the signs that indicate a need for expert attention ensures that more significant problems do not develop. If your hot water issues persist despite your best efforts, a trained professional can conduct thorough diagnostics using specialized equipment.
One notable indication that you should engage a professional is if you encounter water discoloration. When rust-colored water pours from your fixture, it might suggest that the interior of your tank has corroded, particularly if your heater is approaching (or past) its expected lifespan of 10-15 years. This situation often heralds a replacement rather than a repair, necessitating specialized equipment and expertise. Moreover, continuous noise, such as rumbling or popping from the heater, may indicate excessive sediment buildup that just simple draining might not resolve.
Identifying Electrical and Gas Concerns
If your heater involves electrical components, encountering any tripped breakers or seeing flickering lights calls for caution. Electricity and water make a dangerous mix, so tackling electrical problems without adequate expertise can be perilous. In gas heaters, the smell of gas is a significant safety concern. Evacuating and seeking professional assistance immediately ensures the safety of everyone in the household. Plumbers and technicians are trained to handle hazardous scenarios and will have the right tools to safely manage and fix gas-line issues.
"Trying to troubleshoot beyond your knowledge can sometimes worsen problems, leading to more expense," says John Matthews, a 20-year veteran of the plumbing industry. "Professionals bring not only their tools but also years of nuanced experience."
Persistent leakage around the tank or signs of water damage near its base indicate a probable breach in your system. This type of situation is often an emergency, as a compromised tank can significantly lower efficiency and presents risks of flooding or structural damage to your home. Only skilled plumbers have the necessary equipment and experience to drain and replace these systems effectively. If you're facing trouble keeping consistent hot water across different taps and showers, it might not be just a single fixture malfunction but an overarching plumbing issue, necessitating a discerning eye of a professional.
Finally, consider the safety and legal implications. Some types of work, particularly those involving gas lines or extensive rewiring, may require permits or adherence to specific building codes. Professionals not only know these regulations inside and out but also carry insurance to cover anything that might go wrong — something a DIY project seldom accounts for. A professional not only provides technical solutions but also peace of mind, knowing the job is done safely and in compliance with local laws.