Thinking of swapping out your electric oven yourself? It's tempting to save a bit of cash and feel the satisfaction of a DIY job well done, but before you unplug anything, there are a few things you should know. First off, not all ovens come with a straightforward plug-and-play setup. Some installations require a bit of electrical know-how, especially if they involve hard-wired connections.
Before you get started, double-check your warranty. You don't want to accidentally void it by taking matters into your own hands. Plus, knowing your current oven's power requirements and making sure your home can handle them is important. Nobody wants to trip all the breakers in the house!
Tools of the trade—you'll need more than just a screwdriver. Wiring might need a tester, and you'll need safety gloves to avoid any nasty surprises. If any step feels like it’s above your pay grade, it might be a good idea to pause and think about whether it's time to call a pro.
- Is DIY Replacement Possible?
- Key Tools and Materials
- Safety Measures to Consider
- When to Call a Professional
Is DIY Replacement Possible?
Before you decide to conquer that electric oven repair mission, let's get real about what you're getting into. The first thing to consider is the type of oven connection you have. If your oven is plugged into a standard outlet, you're already in a better place for a DIY attempt. However, if it’s hardwired into your electrical system, things get a tad more complicated.
DIY oven replacement often depends on the build of the kitchen and the electrical system setup. For many modern homes, swapping out an electric oven involves disconnecting wires that must be handled with care and precision to avoid mishaps.
Check the Power
Make sure to confirm the power requirements of both your old and new ovens. This usually involves comparing the ampere and voltage specifications. Using an appliance that draws more power than your electrical system can handle isn't just unsafe — it’s a fire hazard.
Tools and Skills
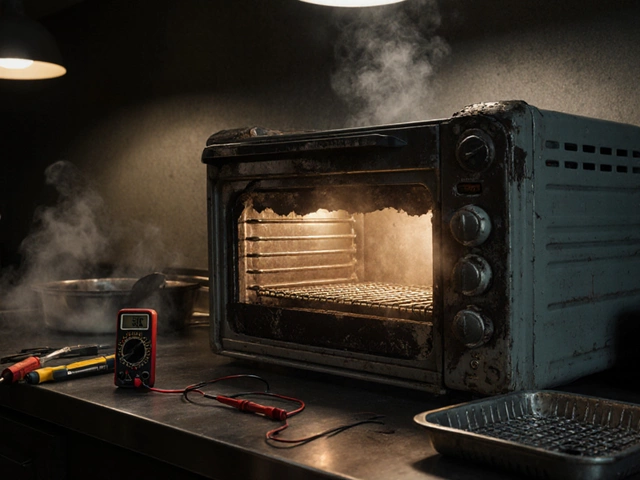
Getting started means having the right tools at hand. Typically, you’ll need a few basics: screwdrivers, a multimeter to test electrical connections, and wire strippers for any electrical adjustments. And, hey, don’t forget those instruction manuals — they're more useful than they seem!
- Disconnect power from the old oven. Look out for breaker switches that need flipping or plugs that must be removed.
- Carefully slide out the old oven. Watch the weight — you might need a hand here.
- Take note of the connections. Photograph them or draw diagrams if necessary — your new oven might require you to connect the wires similarly.
- Slide in your new oven and make the necessary electrical connections.
- Secure it in place, ensuring good airflow, especially if your model requires ventilation.
If any of these steps feel daunting, calling a professional can save you a headache. Everything might seem straightforward until you're knee-deep in wires, realizing it’s more than you bargained for.
| Task | Professional | DIY |
|---|---|---|
| Installation Time | 1-2 hours | 2-4 hours |
| Cost | £80-£150 | £0 or tool costs |
So, to wrap it up, yes, installing an electric oven yourself is possible but depends on your confidence and skill level. If you're unsure at any point, play it safe and reach out to an expert.
Key Tools and Materials
Jumping into a DIY oven replacement? You'll need the right gear to get the job done efficiently and safely. Here’s a rundown of what you should have on hand.
Essential Tools
- Multimeter: This handy gadget will help you verify that the circuit is dead before you start messing with any wires. Safety first!
- Screwdriver Set: Most ovens use standard screws, but having a variety can save you a trip to the garage.
- Wire Stripper: If your oven's wiring isn’t already prepped, a wire stripper will make handling them much easier.
- Adjustable Wrench: Helpful for when you’re disconnecting the old oven and securing any fittings.
Key Materials
- Electrical Tape: Great for securing wire nuts and safeguarding any exposed wires.
- Mounting Hardware: Check if your new oven comes with its own kit; otherwise, you might need to use existing hardware or buy new.
- Cable Clamps: These are crucial if you want to keep the wiring anchored and tidy behind your new setup.
Having these tools and materials at your side will not only make the process smoother but also keep you out of trouble. Extra tip: Always read the manual. Each electric oven repair job can have its own quirks, and manufacturers often highlight important installation notes.

Safety Measures to Consider
Tackling an electric oven repair project isn't just about having the right tools; safety is a huge piece of the puzzle. Electricity is no joke, so let's look at what you need to have on your checklist before getting started.
Power Matters
First things first, ensure the power is off. Your main circuit breaker is your best friend here. Switch off the power to your oven's circuit and double-check with a tester—things can go from zero to frying in no time if you skip this step.
Dress the Part
Next, gear up with some basic safety gear. Wear insulated gloves; they might look funny, but they're a lifesaver. It’s also smart to don safety goggles. Better safe than seeing stars!
Handle with Care
If you've got a helper, even better. These things can get heavy, and maneuvering an oven solo can lead to broken toes or worse. It’s one case where a friend does more than just keep you company.
Wire with Wisdom
Got wiring to manage? Here’s where things can get technical. Make sure the wires are properly insulated and secured. Loose or frayed wires spell trouble, and not the fun kind. And if any labels have you scratching your head, don’t guess—find a wiring diagram that matches your model.
Fire Hazards
Also, think ahead about fire safety. It's worth keeping a fire extinguisher close by, just in case. Many electric oven accidents stem from simple mishaps that could be avoided with a little preparation.
Taking these precautions seriously can prevent a repair project from turning into a crisis. Keeping your space safe lets you focus on what matters—getting that sleek new appliance ready to cook up a feast!
When to Call a Professional
While the idea of performing a DIY oven replacement might be enticing, there are moments when you’ll be better off leaving it to the experts. First and foremost, if the oven installation requires you to deal with electrical wiring directly, and you’re not completely confident in your knowledge of this, it’s time to pick up the phone.
Signs You Need Expert Help
Some clear signals scream for a pro's touch:
- If your current setup involves a hard-wired connection. Changing this without the right know-how can be hazardous.
- The electrical load of the new oven exceeds what your system can handle. This could lead to power cuts or worse, a fire risk.
- If your home’s electrical panel looks like it’s from a bygone era and doesn’t match up with modern ovens.
- Funky smells or smoke coming from your outlet when you try to test the new setup. That’s a red flag!
Benefits of Hiring a Professional
Sure, hiring someone might feel like admitting defeat, but they bring a level of expertise that guarantees safety and proper installation. Professionals not only help avoid potential risks but usually offer warranties on their work. So if something does go wrong, you're covered.
In the electric oven repair world, peace of mind is invaluable. Sure, calling a professional might seem like a dent in the wallet now, but it could save you heaps in future repairs.


