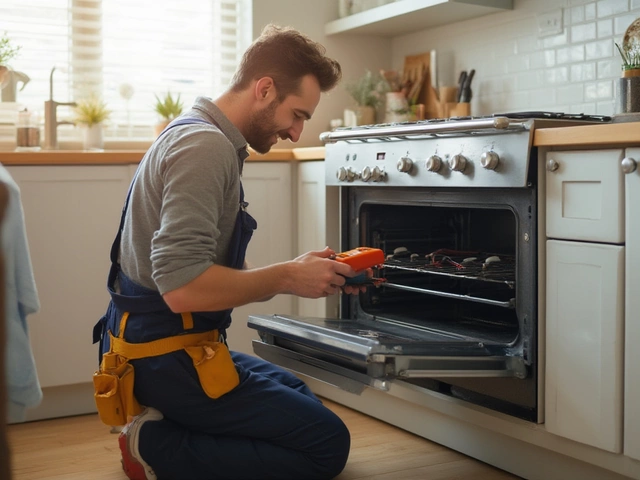
Ever had the joyful experience of opening your oven for a Sunday roast, only to find it stone cold? Getting an electric oven back in working order might seem like a daunting task, but it might not be as tricky as it seems. Sure, some repairs need a tech pro, but others are surprisingly doable.
Start with the basics! Know your oven's parts: heating element, thermostat, door switch. These are the usual suspects when things go wrong. Dig around with a little curiosity, and you might save yourself a steep repair bill. And guess what? You don't need a full tool shed to handle most fixes. Having a multimeter and a couple of screwdrivers might be all it takes.
- Understanding Basic Oven Components
- Common Problems and Quick Fixes
- When to Call a Professional
- Safety Tips for DIY Repairs
- Preventive Maintenance
Understanding Basic Oven Components
Diving into the guts of your electric oven can be an eye-opener. It's not magic, just a series of components working together. Kicking off with the heating element, the heart of any oven. This piece heats up to roast your vegetables or bake your favorite pie. The heating element is usually visible at the bottom of the oven or along its ceiling.
Next, meet the thermostat. Think of it as the oven's brain, making sure it doesn't go rogue and overheat your culinary creations. If you've ever noticed your oven running hot or cool, the thermostat is the likely culprit. It reads the internal temperature and tells the heating elements when to turn on or off. Without it, the oven's like a car without a driver.
And then there's the door switch—a simple but critical piece. Ever notice how the oven light turns on when you open the door? That's this little switch at work. It also tells the oven to cut power to the heating elements, therefore conserving energy and keeping things safe.
Additional Components
Let’s not forget the control board, especially in newer models. This is the command center where all the buttons and dials are connected. If your oven won't start or the settings seem off, a hiccup here might be to blame.
Simple Troubleshooting
Say your oven's not heating up right; the first thing you might suspect is the heating element itself. But if that looks fine, check that the wiring hasn’t gone off the rails or the thermostat isn't out of sync. Want to go deeper? Bust out a multimeter to test continuity in these parts. It's as easy as following YouTube tutorials for step-by-step instructions.
Understanding these vital parts gives you an edge in tackling any electric oven repair problems that might crop up. And while a table might not seem like an exciting part of your kitchen experience, here's a simple rundown of some components and what they do:
| Component | Function |
|---|---|
| Heating Element | Heats the oven chamber. |
| Thermostat | Regulates oven temperature. |
| Door Switch | Turns off heating when door opens. |
Common Problems and Quick Fixes
Got an oven acting up? Before calling for help, let’s check out some common issues and easy fixes you can try yourself. You might be surprised at how straightforward some of these can be!
Oven Not Heating
One of the most frequent complaints is an oven not heating up properly. The culprit? A faulty heating element. Here’s what to do:
- Unplug the oven. Safety first!
- Check the heating element for signs of damage like blisters or breaks.
- If busted, replace it. These parts aren't usually too pricey and can be swapped out without too much hassle.
If the element seems fine, the problem might lie with the thermostat. A multimeter can help check if it's working correctly.
Oven Door Won't Close
Annoying, right? If the door doesn't close, heat escapes, making cooking a weird guessing game. Check the hinges:
- Examine where the hinge connects to the oven body and door.
- If screws are loose, tighten them up.
- If the hinge looks warped, it might need replacing.
Sometimes, the problem is as silly as gunk buildup on the door seals. Clean it up, and you might just fix the issue.
Uneven Cooking
Your dishes are coming out unevenly cooked? It might not be your culinary skills. Check these possible causes:
- Inspect the gasket (that's the seal around the oven door) for wear and tear. A leaky gasket can mess with the temperature inside.
- Make sure shelves are correctly positioned, and you're not blocking the airflow with oversized trays.
It's worth noting that most ovens should have a temperature variance of just about 25 degrees Fahrenheit (up or down) from the target temperature. Anything more, and there might be a problem with the calibration.
Getting your oven repair right is often about understanding these small tips and fixes. Remember, when in doubt, it's okay to consult someone more experienced. Just don’t leave it until you're left with half-baked cookies!

When to Call a Professional
So, you’ve tried your best with the DIY approach, but things are still not clicking—or heating, for that matter. Knowing when to throw in the towel and call in a professional can save you from further headaches and, sometimes, additional costs.
Signs It's Time to Get Help
There are some red flags that could mean it's time to reach out for expert help:
- Electrical Issues: If your oven isn’t turning on at all, despite having power, or if it’s tripping the circuit breaker, it’s best to consult a professional. Messing with electrical systems can be dangerous and might make things worse.
- Internal Components: When the issue seems buried deep inside, like a broken thermostat that won’t budge or a control board glitch, a professional can diagnose and fix this complexity without further damage.
- Gas Models: If you have a dual-fuel or gas oven and detect any gas odors, it’s crucial to call a professional immediately. Gas-related issues can be hazardous to both health and property.
The Cost Factor
Of course, the cost of professional repair is something to keep in mind. While minor fixes are often affordable, more complex problems might be a bit pricier. But spending a little extra upfront often prevents bigger, costlier damages later on.
| Type of Repair | Approximate Cost |
|---|---|
| Minor Repairs | $50 - $150 |
| Electrical Fixes | $150 - $300 |
| Gas/Oven Component Replacements | $200 - $500 |
Ultimately, the decision to go from DIY to pro depends on your comfort level and the complexity of the problem. Remember, an experienced hand not only ensures a job well done, but also provides peace of mind.
Safety Tips for DIY Repairs
Thinking of fixing that stubborn electric oven yourself? Hold up. Before you jump in, it's crucial to keep safety front and center. It might seem like a couple of wires and screws, but there's more than meets the eye.
Turn Off the Power
First thing's first, flip that circuit breaker! You don’t want any nasty shocks. It's surprising how many people forget this step. Make sure your oven is completely disconnected from the power source before starting any repair.
Get the Right Gear
No one expects you to suit up like an astronaut, but some basic gear can make a world of difference. Rubber gloves for insulation, safety goggles to keep those flying screws out of your eyes, and a trusty toolkit with insulated handles are essentials.
Be Aware of Hot Surfaces
Even if your oven hasn’t been on for a while, hot spots can linger. Always assume any metal parts are hot, and proceed with care. Let your oven maintenance session be more about brain work than burns.
Use the Right Replacement Parts
You've identified the problem—great! But don’t just swap out parts willy-nilly. Using the wrong components can cause more harm than good. Always match part numbers and adhere to the manufacturer's recommendations.
Keep Children and Pets Away
This might sound like a no-brainer, but you'd be amazed at the mischief a curious kid or a nosey pet can get up to. Keep them out of the workspace for their safety and your sanity.
Know Your Limits
It's tempting to tackle everything yourself, but know when to step back. If the issue goes beyond your comfort level—say, dealing with complex electronics—consider calling in a professional. Sometimes spending on expert help beats risking costly mistakes.
| Common Tools Needed | Purpose |
|---|---|
| Multimeter | Test electrical connections |
| Screwdrivers | Remove panels |
| Rubber Gloves | Prevent electrical shock |
Armed with these tips, you're all set to tackle the bulk of your DIY oven projects with confidence. Just remember, safety first, and everything else should fall into place. Happy fixing!
Preventive Maintenance
If you've ever been stuck with a broken oven right before a big dinner, you know how crucial preventive maintenance can be. Keeping your oven in check not only saves headaches down the line but also keeps energy costs in check.
Regular Cleaning
One of the simplest yet most effective maintenance tasks is cleaning your oven regularly. Grease and food particles can mess with your oven’s efficiency. A simple combo of baking soda and vinegar can work wonders. Let it sit, scrub it down, and voilà!
Check the Seal
The oven door seal is another biggie in the maintenance game. A worn-out seal lets heat escape, making your oven work harder. Check for any cracks or gaps, and replace if needed. No one wants higher electric bills, after all!
A Quick Checklist
Every few months, run through this quick checklist to keep things smooth:
- Inspect heating elements: Make sure they’re evenly glowing when on. Any odd colors or cold spots could signal it’s time for a change.
- Thermostat accuracy: Use an oven thermometer to check if the actual temperature matches the set temperature. Calibration may be necessary.
- Door hinges: Ensure they close properly—loose hinges waste heat.
- Vent cleaning: Clear out any blockages to keep airflow normal.
Here’s a nugget of data that might surprise you—approximately 25% of oven issues are due to neglecting these simple maintenance checks. So, keeping an eye on these things could save you from becoming a statistic.