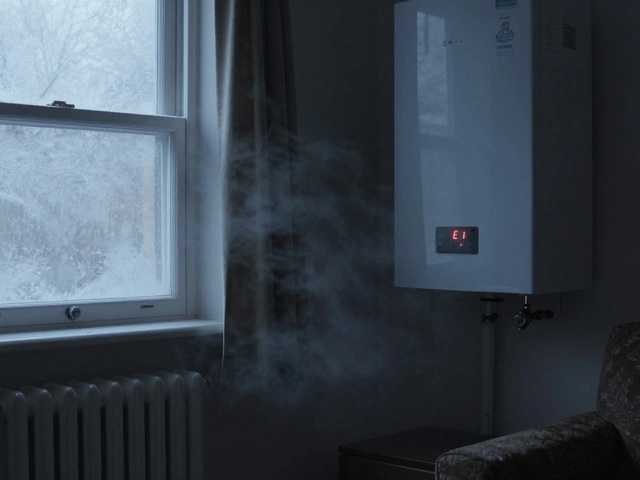
When people hear “boiler replacement,” most imagine dust swirling, muddy bootprints, and a house that looks like a construction zone for days. Not totally wrong, but it’s not a total disaster either—especially if you plan ahead. The process messes up some spots in your home, but most crews have tricks to keep things under control.
The real question: which parts of the job get messy and what kind of mess are we talking about? There’s some debris, definitely, especially if your old system is ancient or corroded. Think chunks of rusty metal, plaster crumbling when they have to yank pipes from walls, and maybe some sludge if your old pipes haven’t seen a flush in years.
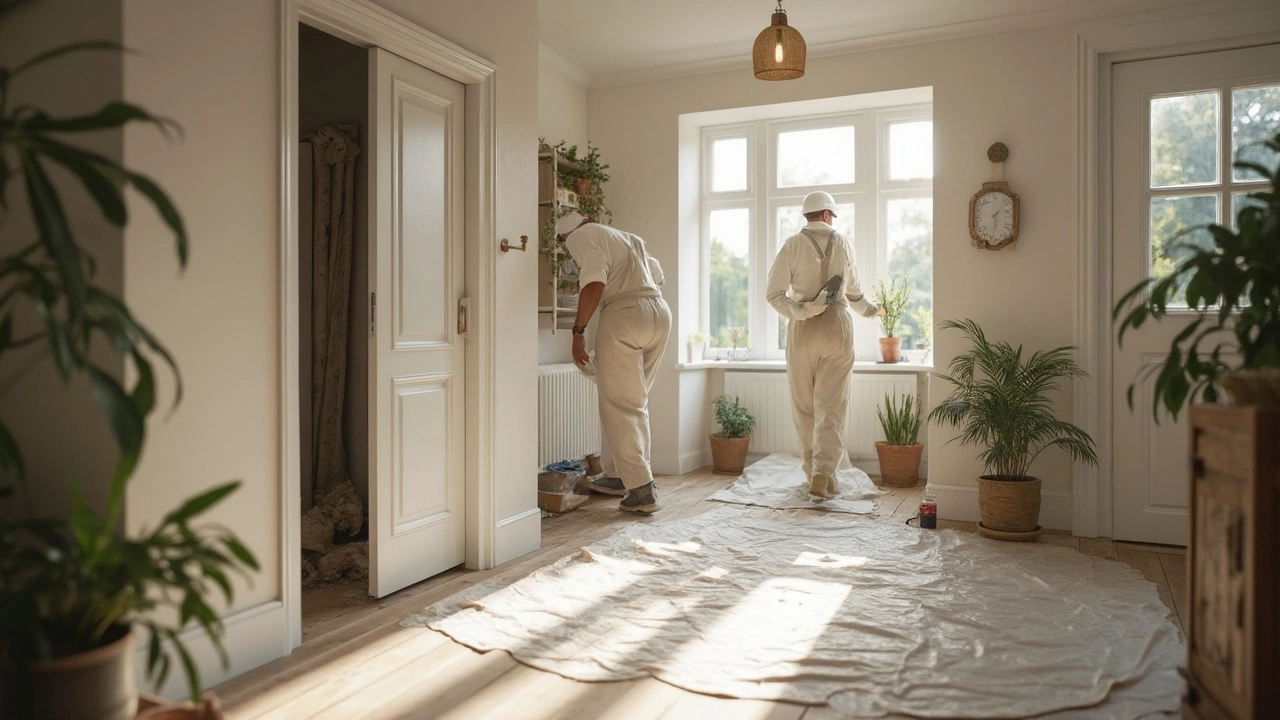
But it’s not a free-for-all. Most good installers use dust sheets, plastic covers, and even their own vacuums to tidy as they go. You’ll still need to move a few things out of the way and maybe accept some noise and dust, but no, your whole home won’t be trashed. Knowing what to expect makes a world of difference, especially if you want to keep your sanity (and carpets) in one piece.
- Why Boiler Replacements Raise Mess Concerns
- What Actually Gets Messy During the Process?
- Surprising Parts That Are Cleaner Than Expected
- How Pros Minimize the Mess (If You Let Them)
- Practical Steps You Can Take to Protect Your Space
- Cleanup Realities After the Install
Why Boiler Replacements Raise Mess Concerns
So, why do people worry so much about boiler replacement being a messy job? It’s not like changing a lightbulb or plugging in a new toaster. You’re removing a big, heavy unit that’s probably been sitting in one spot for years, maybe even decades. Most older boilers were installed back when nobody thought about easy swap-outs—meaning they’re tucked in awkward corners, boxed in by cabinets, or surrounded by pipes that look like a plate of spaghetti.
Here’s what usually kicks up the most mess during a boiler replacement:
- Old debris and dust: Boilers outlast carpets and sometimes owners, so behind and under them you’ll find years of dust, dirt, and lost bits of rubbish that never got cleaned out.
- Piping and plaster: When engineers remove old pipes or make space for new ones, plaster and wall dust go flying. In some homes, pipes were boxed in behind cheap paneling that crumbles as soon as it’s touched.
- Rust and sludge: If the old boiler was leaking or if the system hasn’t been maintained, engineers might find black sludge lurking inside the pipes or rust patches on the metal—neither of which stays tidy once disturbed.
If you’re looking for hard facts, the UK puts out around 1.7 million new boiler installations a year. Most installers say the messiest part, hands down, is removing the old system, especially when it’s stuck behind heavy appliances or inside fitted cupboards.
Many homeowners also worry about water leaking onto floors when engineers disconnect pipes. While it’s rare for a pro to flood your kitchen, a little spillage is pretty standard—especially in houses with older plumbing or awkwardly placed drains.
So mess concerns aren’t just paranoia. The mix of old materials, big hardware, and plumbing can make things look worse before they get better. But knowing what actually causes the mess helps you deal with it—and reminds you it won’t last forever.
What Actually Gets Messy During the Process?
The truth is, replacing a boiler means dealing with a certain level of mess—there’s no way around that. The bulk of it starts with getting your old boiler out. If your system’s been around for ten or twenty years, it’s probably caked with dust, grime, and sometimes even sludge from inside the pipes. When the pros detach it, some of that gunk is going to escape.
One big mess factor: water. Even with careful draining, it’s nearly impossible to avoid leaking a little. You may see some water on the floor, especially if the pipes were full of rusty buildup. If radiators or pipework have to be modified, expect bits of dirty water to appear. It pays off to clear the area near the boiler replacement zone so your belongings don’t get splashed.
Next up, debris. Here’s where things get gritty. Any walls or floors that need drilling or cutting for new pipework will throw out dust, plaster particles, and maybe brick rubble if you’re upgrading venting. It’s not Mount Everest levels of dust, but you’ll notice it settling on surfaces, especially around the work area.
- Metal fragments from disconnected pipe joints
- Bits of insulation if lagging is replaced
- Wall dust around new pipe routes
- Packaging leftovers from the new boiler install
If your boiler lives in a kitchen or laundry room, expect cabinet contents or counters to get a dusty coating. In hallways, carpets are at risk from mud tracked in and tiny screws or washers dropping off. Some installers now use sticky floor protectors, but it’s good to assume you’ll want a vacuum waiting.
Here’s a quick look at the messiest stages of a typical boiler replacement job:
| Stage | What Gets Messy? |
|---|---|
| Old boiler removal | Rust, sludge, and old dust released |
| Piping changes | Metal shavings, dirty water |
| Drilling for new flues/vents | Plaster, brick dust |
| Connecting new boiler | Packing materials, minor water spills |
So, yes—boiler repair or swap-outs do cause mess. Knowing these points gives you the upper hand to cover valuables, tape off rooms, or prep the vacuum cleaner in advance.
Surprising Parts That Are Cleaner Than Expected
Here’s something most people get wrong: not every step in a boiler replacement is a mess fest. In fact, a lot of the process is surprisingly tidy, even when you’ve got radiators, pipes, or an old tank to deal with. Let’s clear up some myths.
First off, modern boilers come with pre-assembled parts. That means there’s way less sawing or hammering in your home. In most newer houses, the swap is often so smooth, you barely see any dust except near where the old unit sits. Technicians usually handle the messy stuff at their van or outside, keeping the chaos away from your kitchen or bedrooms.
Another thing? The gas connections. Swapping out old gas lines sounds risky and messy, but professionals use packets and specialized sheet covers to catch debris. Plus, most new boilers just connect to the existing pipes with little fuss. Even the dreaded "bleeding" of radiators to get the air out is nothing like the muddy scene you might imagine—it’s usually quick, with just a towel needed for spills.
Don’t worry too much about water leaks, either. Engineers shut off water and gas, then drain the system fast. A couple of buckets catch most of the runoff, so the big floods you hear about are rare. They even have large mats to protect floors around the work zone.
Check this out—according to a 2023 UK trade survey of heating installers (sample size: 510 jobs in occupied homes), here’s how often homeowners reported a mess in certain spots:
| Location | Reported Mess |
|---|---|
| Boiler room/cupboard | 81% |
| Nearby hallway | 22% |
| Living spaces | 9% |
| Kitchen (if not boiler site) | 3% |
So, if you’re dreading dirty footprints through your entire home, that’s extremely rare. Most mess sticks close to the actual work area. Even better, newer installers use “no-mess” booties and bring their own compact vacuums. Unless your old boiler is buried deep behind kitchen units or under floorboards, most of your house stays mess-free.

How Pros Minimize the Mess (If You Let Them)
The best part about hiring pros for boiler replacement is that they’ve seen it all and have plenty of simple tricks to stop your home from becoming a disaster zone. Good installers don’t just barge in—they show up with a plan (and a car full of gear to keep things clean).
Here’s what separates a pro from a cowboy outfit when it comes to keeping mess under control:
- Dust Sheets and Plastic Covers: The crew covers floors, stairs, and any nearby furniture with heavy-duty dust sheets or plastic wrap before they even bring in tools. That means less cleaning for you later.
- Shoe Covers: Some companies give techs disposable shoe covers, so mud and outdoor dirt don’t follow them through your house.
- Designated Work Zones: Pros set up a clear workspace—sometimes using temporary barriers or ZipWalls—so debris stays put. This is especially true in homes with kids or pets wandering around.
- Clean-As-You-Go: Reputable installers vacuum up dust, sweep, and remove old parts as they work. You might even see them using handheld vacuums or small dust extractors connected to their saws and drills.
- Pipe Cutting Outside: Instead of filling your kitchen or hallway with sparks and copper shavings, pros usually cut pipes outdoors or in a garage when possible.
The real game-changer? Communication. Before they start, the team leader will walk you through what rooms they need to access and what areas they plan to cover. You can always ask if you want extra plastic put down or if you’d rather they use a separate entrance. Don’t be shy.
Check this out—according to a 2023 homeowner survey run by Which?, around 78% of people who used Gas Safe registered installers said the crew left their home clean or only needed a basic mop up. That’s a pretty good hit rate when you think about hauling out a decades-old boiler and dragging in parts for the new one.
| Pro Tactic | Typical Result |
|---|---|
| Dust sheets everywhere | Reduces clean-up time by 50%+ |
| Pipe cutting done outside | Keeps metal shavings out of the house |
| Vacuuming as they go | Minimal leftover dust |
| Clear workspace barriers | Mess limited to one area |
Bottom line? Letting the pros do their thing and not skipping corners on protective steps makes your boiler installation a lot less chaotic. If you want to be extra cautious, ask in advance what clean-up is included in the quote.
Practical Steps You Can Take to Protect Your Space
If you want to dodge the worst of the mess during a boiler replacement, don’t just cross your fingers—do a little prep. It makes a big difference, especially if you care about your floors, furniture, or sanity. Here’s what really helps homeowners keep things under control.
- Clear the work area first. Remove anything valuable or breakable from the boiler room and leading pathways. Think of it like moving day: the fewer trip hazards or dust-magnets, the better.
- Cover your floors and furniture. If your installer isn’t bringing drop cloths, grab some old sheets, towels, or even cardboard for walkways. It’s great for carpeted areas that love to trap dust.
- Seal doors and vents near the work area. A roll of painter’s tape and some thick plastic sheeting can stop dust from traveling into other rooms through draughts or vents.
- Open windows for ventilation, weather permitting. It’s the easiest way to stop your home feeling stuffy when the job kicks up dust or fumes, plus it speeds up the clean-up.
- Let your installer know about your concerns. Good pros appreciate a heads-up if you’re picky about certain items or rooms. Don’t be shy—they’d rather steer clear than accidentally splash mud on grandma’s sofa.
- Keep pets and kids far away. With tools and sharp bits lying around, safety comes before convenience. Find them a safe zone somewhere else while work’s going on.
If you’re wondering how much time to block out for all this, most companies say it takes about 10–20 minutes to prep each area. Here’s a quick table showing what to expect for common home spaces:
| Space | Average Prep Time | Protection Needed |
|---|---|---|
| Boiler Room | 10–15 min | Move all items, cover floor |
| Hallways | 5 min | Lay protective runners |
| Living Room Nearby | 10 min | Cover furniture, close vents |
Doing some of this prep yourself can even shave time off your final bill, since the installers won’t have to dodge clutter. It’s small stuff, but it helps keep the chaos from getting out of hand during boiler repair or installation.
Cleanup Realities After the Install
The moment the boiler replacement crew packs up, you might think your place should look untouched. Real talk? That's rarely the case. Even with pros who do their best to control debris, there’s almost always leftover mess: dust, old pipe bits, and sometimes grease smudges where tools and hands have been.
If your old boiler was in a tucked-away spot like a basement or utility room, you might notice footprints or traces of dirt leading through the house. Kitchens and hallways are hot zones for this kind of mess too. Companies usually do a basic sweep and wipe down, but it’s a quick once-over, not a detailed clean. You’ll probably want to follow up with your own cleaning tools:
- Vacuum floors and any rugs that came even close to the work area. Fine particles stick around for days otherwise.
- Wipe down radiators, skirting boards, and surfaces—dust can land in weird places you wouldn’t expect.
- Double-check under the new boiler and behind it for stray screws or tiny bits.
- If your system upgrade involved flushing or draining, keep an eye out for water marks or oily spots around nearby drains.
Many companies offer an optional deeper clean for an extra fee, but you still shouldn’t expect them to treat your home like a hotel. Have realistic expectations: standard boiler repair folks aren’t professional cleaners.
If allergies are a thing for your family, consider running an air purifier for a day or two post-install—those fine particles love to hang in the air. And don't forget, if pipework has changed or the boiler moved, there can be patches in paint or small wall repairs to sort out. That’s normal, not a sign of a botched job.
Just so you know what’s fair game, here’s a typical breakdown of what crews handle vs. what falls to the homeowner:
| Who | What They Clean |
|---|---|
| Installers | Major debris, obvious dust, visual sweep of the site |
| Homeowner | Detailed vacuuming, dusting, color touch-ups, any left-behind fine dust or water stains |
Basically, a boiler replacement won’t leave your home in ruins, but don’t toss out the vacuum yet. Expect a little elbow grease and maybe some extra laundry—just part of the real experience.