Your dryer just ate another hour of your day, and your jeans are still damp. Been there? Dryers are supposed to make life easier, but when they mess up, laundry piles up fast. Most dryer problems sneak up slowly: maybe your clothes take longer to dry, or you catch a faint burning smell. Sometimes it’s a loud squeak you just can’t ignore. No matter what, it’s a headache you don’t need.
The good news: Most dryer problems have some telltale signs you can spot early if you know what to look for. Catching them early not only saves money, but it’ll also help you avoid those "how long can I make these socks last?" moments. We’ll go through the usual trouble spots, why dryers break down, and easy things you can do before you even think about grabbing your phone for a service call.
- Classic Dryer Problems People See Most
- Why Isn’t My Dryer Heating Up?
- Strange Noises and What They Mean
- Clothes Still Wet? Troubleshooting Poor Drying
- Lint Buildup and Safety Risks
- When to Call a Repair Tech (and What to Expect)
Classic Dryer Problems People See Most
Most dryer headaches come down to a handful of classic issues. If you own a dryer long enough, chances are you’ll run into at least one of these. Let’s get right into what tends to go wrong and why it keeps happening.
- Dryer not heating up: The number one complaint. This is often because of a blown heating element, faulty thermostat, or a busted thermal fuse. Without heat, your clothes are left damp and your laundry routine drags on and on.
- Drum not spinning: If you press the start button and hear humming but nothing moves, the belt may have snapped, the motor could be shot, or the idler pulley might have given out. Belts wear out with use, especially if you overload your dryer.
- Excessive noise: Squeaks, bangs, and rattles are usually from worn drum rollers, bearings, or loose parts inside. That squealing noise you hear? It almost always means a roller or tensioner needs attention.
- Clothes take forever to dry: If your towels need several cycles, the vent might be clogged, or your lint filter could need a good clean-out. Less air flow means less drying power.
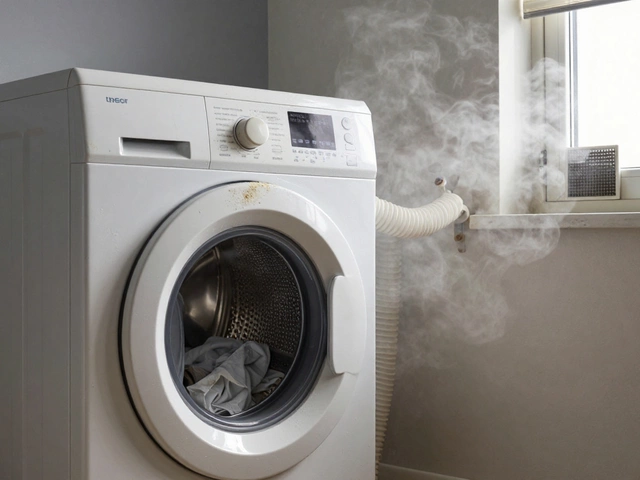
- Burning smell or overheating: A clogged lint trap or vent can overheat your unit, which is a real fire risk. If you notice this, shut off your dryer and check for lint before going any further.
- Dryer shuts off mid-cycle: This might be a problem with the door switch, a faulty thermal fuse, or a control board issue. Some dryers just have sensitive sensors that trip if anything’s out of whack.
It’s wild—about a third of all dryer service calls come down to a simple clogged vent or full lint trap, which anyone can fix at home with a vacuum and a bit of time. Keeping these parts clean not only saves money but also helps prevent breakdowns altogether.
Why Isn’t My Dryer Heating Up?
If your dryer spins but your clothes come out damp, the heat’s gone missing. This is easily one of the most common tumble dryer repair calls. Here’s why it happens and how to figure out what’s going wrong.
First, check the basics. A dryer needs two things to make heat: a power source and nothing blocking airflow. Electric dryers need both 120V and 240V. Gas dryers need an open gas valve and steady supply.
- Blown thermal fuse: If your dryer is plugged in but stays cold, a blown thermal fuse is the top suspect. This safety device shuts things down when it gets too hot. Fuses blow mainly from lint clogs or blocked vents.
- Bad heating element: In electric dryers, a broken heating element can’t make heat at all. You’ll need a multimeter to test it, but visually, if it’s burnt or visibly broken, that’s your culprit.
- Faulty igniter or gas valve solenoid (for gas dryers): If you hear clicks but no flame, the igniter could be toast or the gas valve solenoids aren’t opening up.
- Broken thermostat: A bad cycling thermostat might think your dryer’s hot enough—and turn off the heater way too soon.
Airflow matters, big time. Clogged lint traps or vent hoses force your dryer to work overtime, and if air can't get out, clothes stay wet. A US Department of Energy bulletin points out,
"A clogged dryer vent reduces efficiency, increases drying times, and can cause a dangerous heat buildup."
Take a look at the numbers. These are the top causes for 'no heat' dryer calls, based on a 2024 appliance repair survey:
| Cause | % of Service Calls |
|---|---|
| Thermal fuse blown | 37% |
| Heating element failed | 29% |
| Vent lint blockage | 22% |
| Thermostat issues | 7% |
| Igniter/solenoid (gas) | 5% |
If your dryer’s not heating, unplug it and check the basics: clean the lint screen, look for kinked or clogged vents, and be sure the breaker isn’t tripped. Anything deeper—like checking fuses or elements—means you’ll want to look up a video or call a pro. Electricity and gas are not where you want to wing it.
Strange Noises and What They Mean
Noisy dryers drive people crazy, but they’re also clear signs that something isn’t right inside. If your dryer suddenly sounds like a rock tumbler or a screeching banshee, don’t ignore it. These noises usually point right to a problem that’s only going to get worse the longer you let it ride.
Here’s a rundown of the most common sounds you might hear, what’s likely causing them, and what you can do about it:
- Thumping or Banging: Usually means you’ve got items like sneakers or heavy zippers bouncing around, but if it happens when empty, there’s likely a drum support roller or rear drum bearing wearing out. The thumping might get worse the longer the dryer runs.
- Squealing or Squeaking: This is classic for worn-out drum rollers, drum glides, or a slipping belt. Sometimes, you’ll only hear it on startup, but eventually, it’ll get louder. Rollers and glides wear down, especially if you’re running lots of loads back-to-back.
- Grinding: Not a sound you want to hear. Grinding often comes from faulty motor bearings or something stuck in the drum or blower wheel. If you ignore it, you could end up needing a new motor or more major repairs, which can get pricey.
- Rattling: Check for loose coins, buttons, or screws inside the drum or filter housing. If nothing’s there, a loose panel or piece of hardware is vibrating around. Tighten it up before something shakes loose completely.
- Buzzing or Humming: This could mean your motor is having a tough time starting up, maybe from a worn belt or even built-up lint. Sometimes, this is a warning sign the motor is about to go out.
Remember, a normal tumble dryer should basically sound like a steady whoosh with some clothes flopping around. Anything else means it’s time for a checkup. If you need to open things up, always pull the plug first—safety’s non-negotiable.
Still stumped or the sound’s getting worse? That’s when it makes sense to look up a local dryer repair tech before a small noise morphs into a broken machine (and a bigger repair bill).

Clothes Still Wet? Troubleshooting Poor Drying
There’s nothing more annoying than pulling out a heavy sweater, only to find it’s just as wet as when you tossed it in. If your dryer isn’t doing its job, there are a few common reasons—and most are pretty easy to check without fancy tools.
First up, make sure you aren’t overloading the machine. A stuffed drum can’t tumble clothes properly, and nothing dries evenly. Stick to the right load size, and things should dry better and quicker.
Next, check that the lint filter is totally clear. This sounds basic, but a clogged lint trap blocks airflow. Less air means poor drying, and you’d be surprised how much this simple fix helps. Clean it out every single load. If you haven’t cleared it in a while, expect your dryer to work a lot slower.
The vent hose is another problem area. If it’s crammed against the wall, bent, or packed with lint, moisture stays trapped inside. Once a month, look at the vent outside your house—make sure it’s blowing out warm air. If there’s barely any flow, disconnect the hose and shake out the junk. You’ll need a vacuum or a long brush for a deep clean now and then.
No luck yet? The heating element or thermostat might be shot. Dryers need hot air to work, and if one of these is dead, your clothes stick around damp no matter how many cycles you run. Brands like Whirlpool or Samsung often have easy-to-swap heating elements, but if you’re not comfortable with taking things apart, it’s best to let a repair pro handle it.
Don’t forget to check your dryer settings. Accidentally picked “air fluff” instead of “high heat”? It happens. Double-check the dials just in case.
- Don’t overload the drum
- Dryer repair tip: Clear lint filters every load
- Clean out vent hoses and exterior vents regularly
- Watch for issues with heating elements and thermostats
- Check your drying cycle and settings
If your clothes still come out wet even after all this, it’s likely time for a professional. Some problems—like failing sensors or wiring issues—aren’t always obvious. Spot these early and a small repair could save you from buying a new dryer before you actually need one.
Lint Buildup and Safety Risks
This part gets ignored a lot, but lint might just be the biggest troublemaker for any dryer repair issue out there. Lint is super flammable, and it doesn’t take much buildup to cause big problems. According to the U.S. Fire Administration, dryers spark around 2,900 home fires each year, mainly because of people skipping lint checks.
It’s not just a fire thing, either. Lint blocks airflow, so your dryer works harder, gets hotter, and your electric bill climbs. You might notice your dryer feels really warm on the outside or is shutting off mid-cycle for “no reason.” Spoiler: Lint is almost always to blame.
| Dryer Fire Facts | Details |
|---|---|
| Annual U.S. Dryer Fires | ~2,900 |
| Most Common Cause | Failure to clean lint |
| Average Loss per Fire | $35 million in property damage (annual) |
Don’t think that clearing the filter is enough. Lint sneaks into the duct behind the dryer and even inside the appliance’s guts. That’s why regular deep cleaning is a must. Here’s how to cut down risk:
- Clean the lint filter every time you use the dryer. No exceptions.
- Once a month, vacuum around the dryer opening and inside the lint filter slot.
- At least once a year, disconnect the vent hose and clear out any lint buildup. You can use a vent brush or a vacuum with a hose attachment.
- If you have a long venting path or lots of bends, check more often. Lint piles up faster when the pathway isn’t straight.
If you see your dryer taking ages to dry clothes, or the top feels hot enough to fry an egg, stop using it and check for lint blockages. And if you spot a burning smell, unplug the machine immediately—don’t risk a fire.
Take this stuff seriously. Skipping regular lint cleaning doesn’t just shorten your dryer’s life—it puts your whole house at risk.
When to Call a Repair Tech (and What to Expect)
Some dryer issues you just can’t (or really shouldn’t) tackle with a YouTube video and a screwdriver. If your drum won’t spin, you’ve got a burning smell that won’t go away, or you hear a grinding noise that sounds like the dryer’s eating itself, it’s time to call in a pro.
Certain fixes are just plain risky: messing with gas lines, electrical connections, or taking the whole thing apart isn’t worth the danger. Professional techs know how to spot hidden problems, follow safety protocols, and keep warranties from getting voided by amateur repairs.
Here are the top signs it’s time to reach out for dryer repair help:
- Your dryer won’t start, even after checking the breaker and power cord
- You smell burning or see scorch marks around the lint trap or vent
- The drum doesn’t turn, but you hear the motor humming
- You find water or excess moisture pooling inside the dryer
- Fuses or breakers trip every time the dryer runs
- No heat, even after cleaning the lint filter and checking settings
So, what actually happens during a tech visit? First, most companies charge a diagnostic fee (usually $75–$150) that’s often rolled into the repair cost if you go ahead. The tech won’t just guess—good ones have meters and diagnostic tools to test heating elements, sensors, timers, and airflow. Expect them to open up the back or top, check wiring, belts, and pulleys, and look for worn parts.
If they find an obvious problem, you’ll get a repair estimate on the spot. If a major part like the control board or motor is cooked, consider the age and price of your dryer before saying yes—if it’s over 10 years old, parts plus labor might not be worth it compared to getting a new unit.
Quick heads-up—here’s how long some typical dryer repairs usually take, plus the average cost, based on 2024 numbers:
| Repair Type | Average Cost (USD) | Time to Fix (minutes) |
|---|---|---|
| Belt Replacement | $100 - $180 | 45 - 60 |
| Thermal Fuse Replacement | $80 - $130 | 30 - 50 |
| Heating Element Repair | $150 - $280 | 60 - 90 |
| Motor Replacement | $220 - $450 | 90 - 120 |
| Control Board | $250 - $400 | 45 - 90 |
If the problem turns out to be a clogged vent, most techs can handle that too. Don’t be shy about asking for a written quote and warranty on parts and labor before any work starts. Good techs will walk you through the fix, offer tips to avoid future problems, and answer your questions without the upsell.


